

What you’ll build
- Detect breaking changes or improvements in agent performance
- Measure the impact of engineering effort on agent optimization (resolution rate + cost per resolution)
Pre-requisites
- An existing agent implementation (Python 3.10+ or Node.js 20+)
- Voker API key (get one here)
- OpenAI API key (get one here)
Implementation
- Python
- TypeScript
Step 1: Project setup
Install the Voker SDK for Python and add your API key..env file.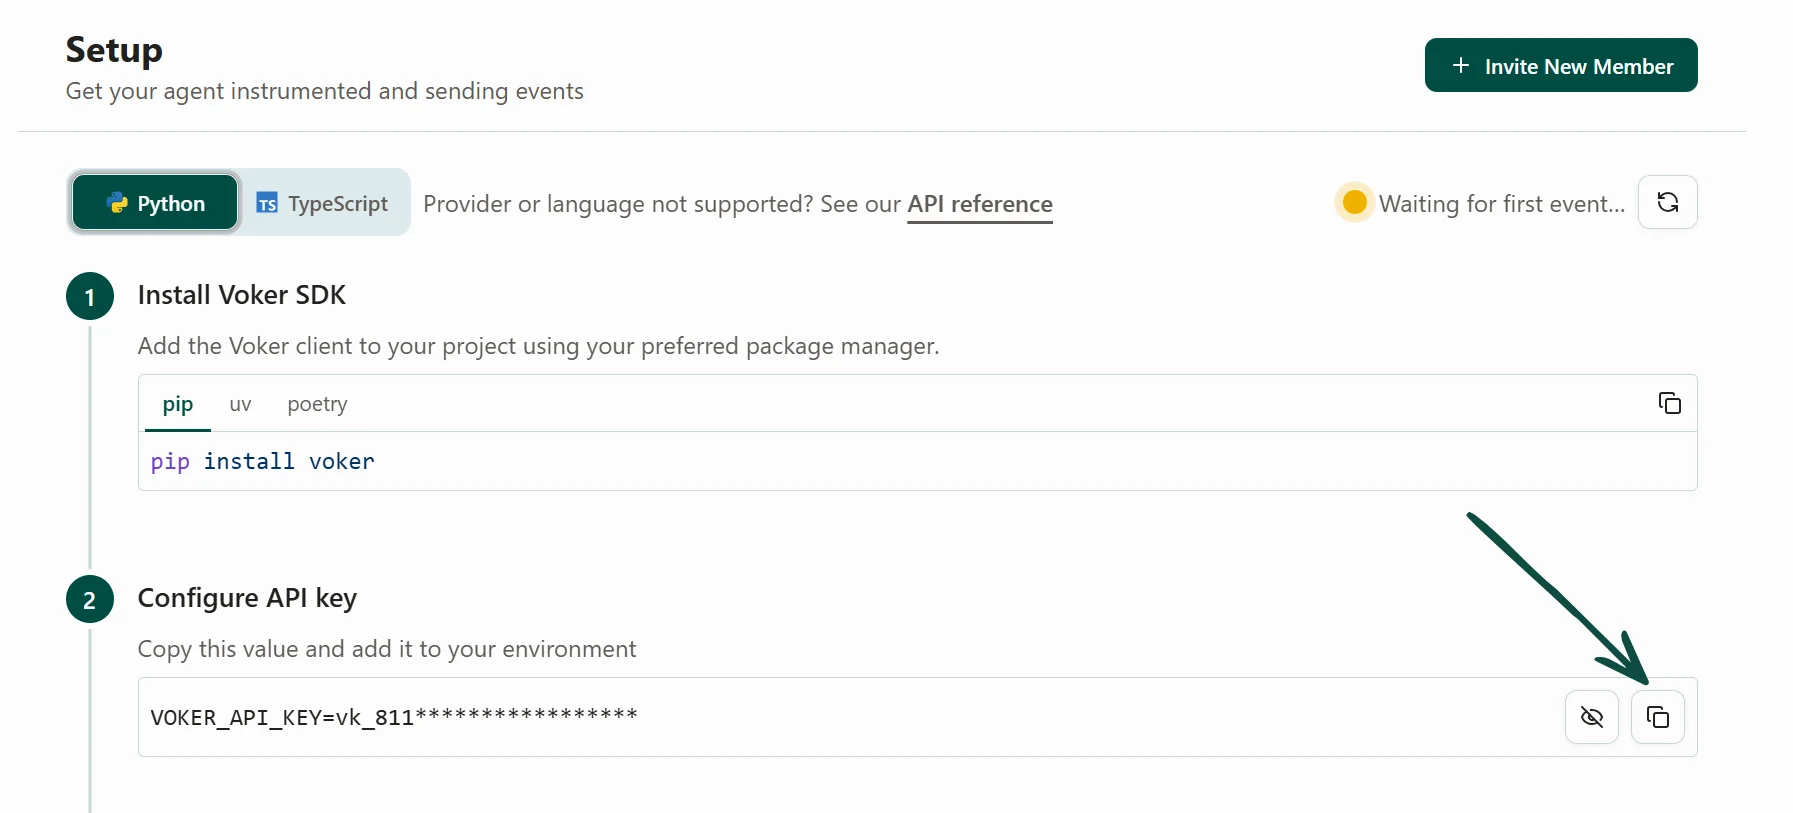
Navigate to the Voker dashboard to find your API key
Step 2: Set Voker parameters in LLM calls
In your project, swap the import for your LLM provider and add these parameters to your LLM calls:voker_session, groups calls into the same sessionvoker_agent, identifies the agent making the callvoker_agent_version, sets an initial agent version
- OpenAI
- Anthropic
- Gemini
Step 3: Make an LLM call and view in dashboard
Make an LLM call with the new parameters. Then go back to Voker, reload the page, and navigate to the Agent tab.You should see your agent listed with the specified version.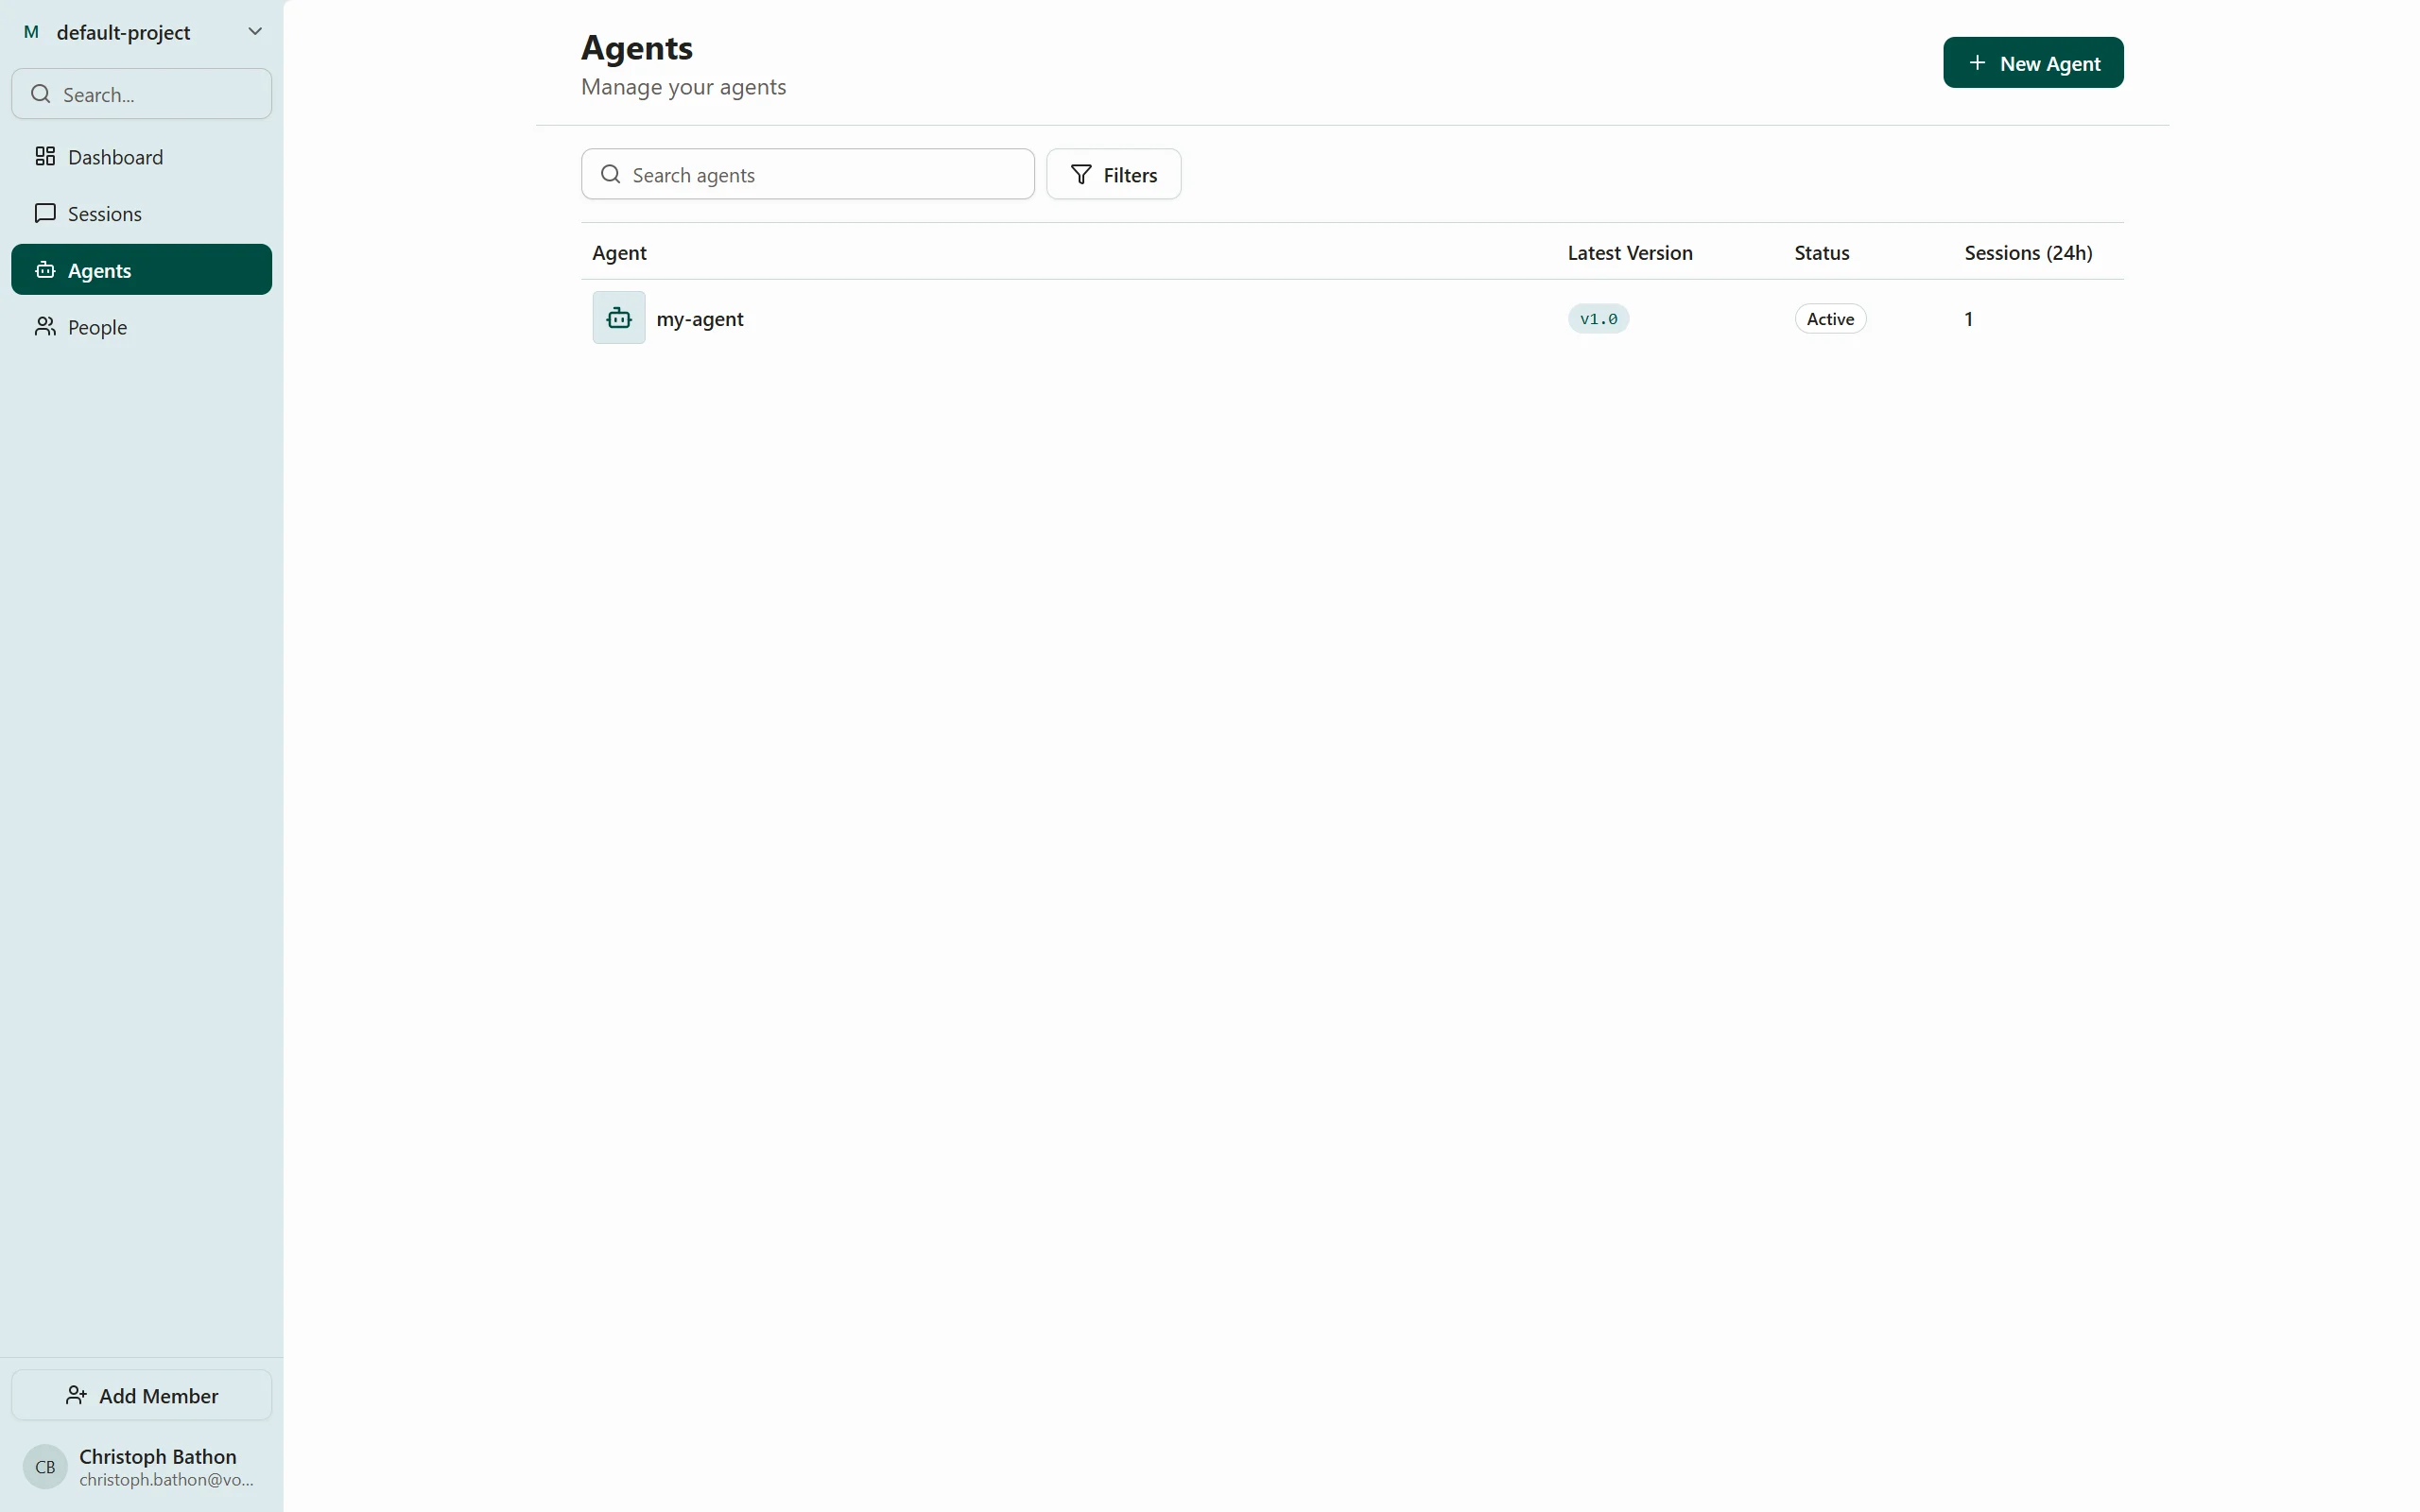
Navigate to 'Agents' in the sidebar
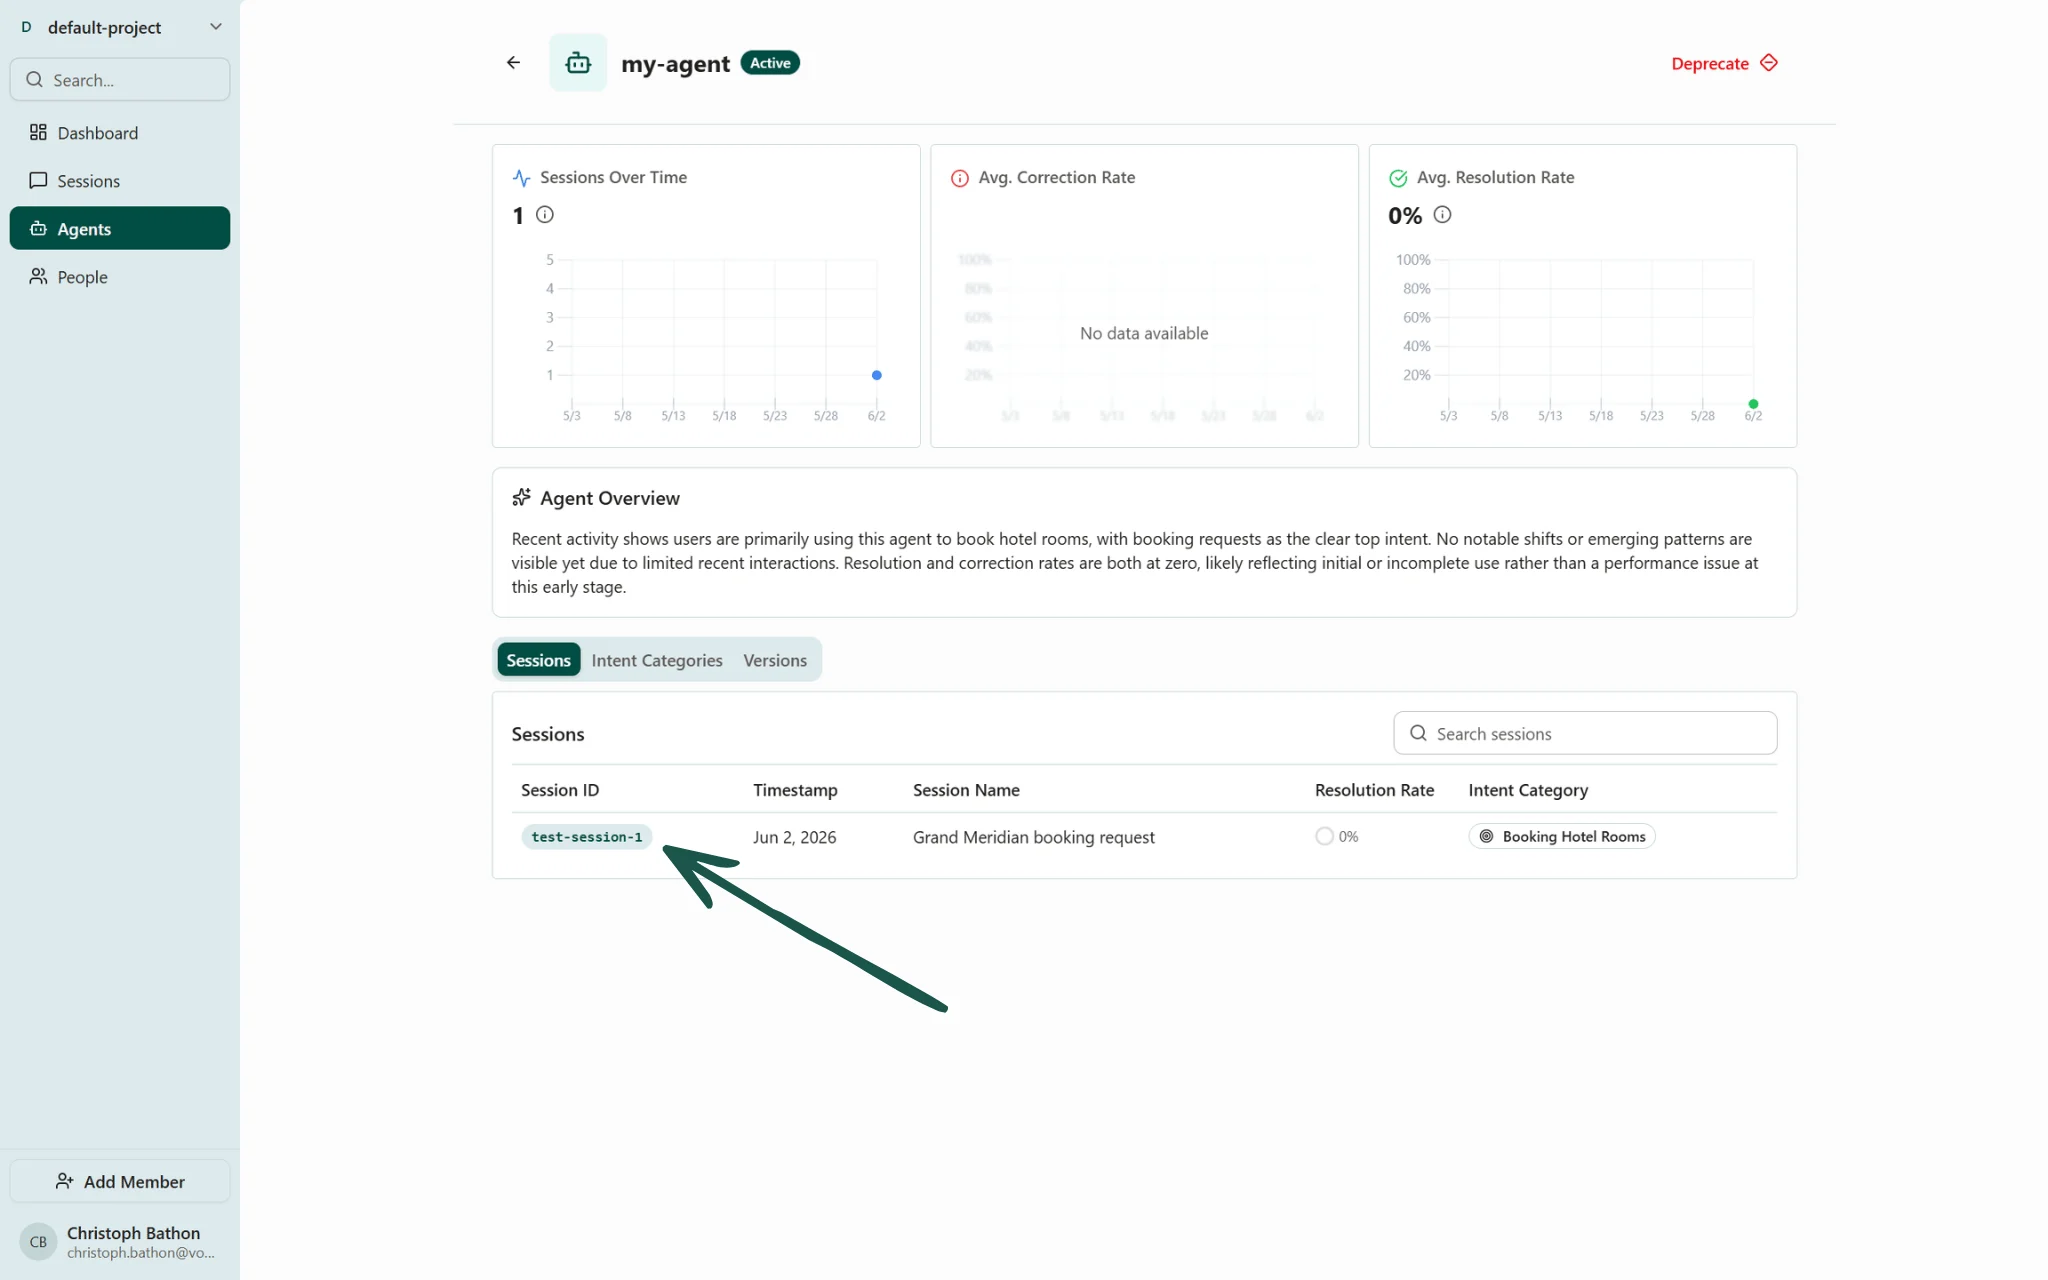
Navigate to 'Agents' in the sidebar and click into the agent to view sessions in the 'Sessions' tab
Step 4: Modify your agent configuration and increment version
In your codebase, update your agent prompt, tools or configuration. Increment thevoker_agent_version field and update the voker_session field for your next call.- OpenAI
- Anthropic
- Gemini
Step 5: Make a new LLM call and compare performance
Make another LLM call with the updated configuration. Then go back to the agent details page in the Voker dashboard. You should see the new session with the updated version.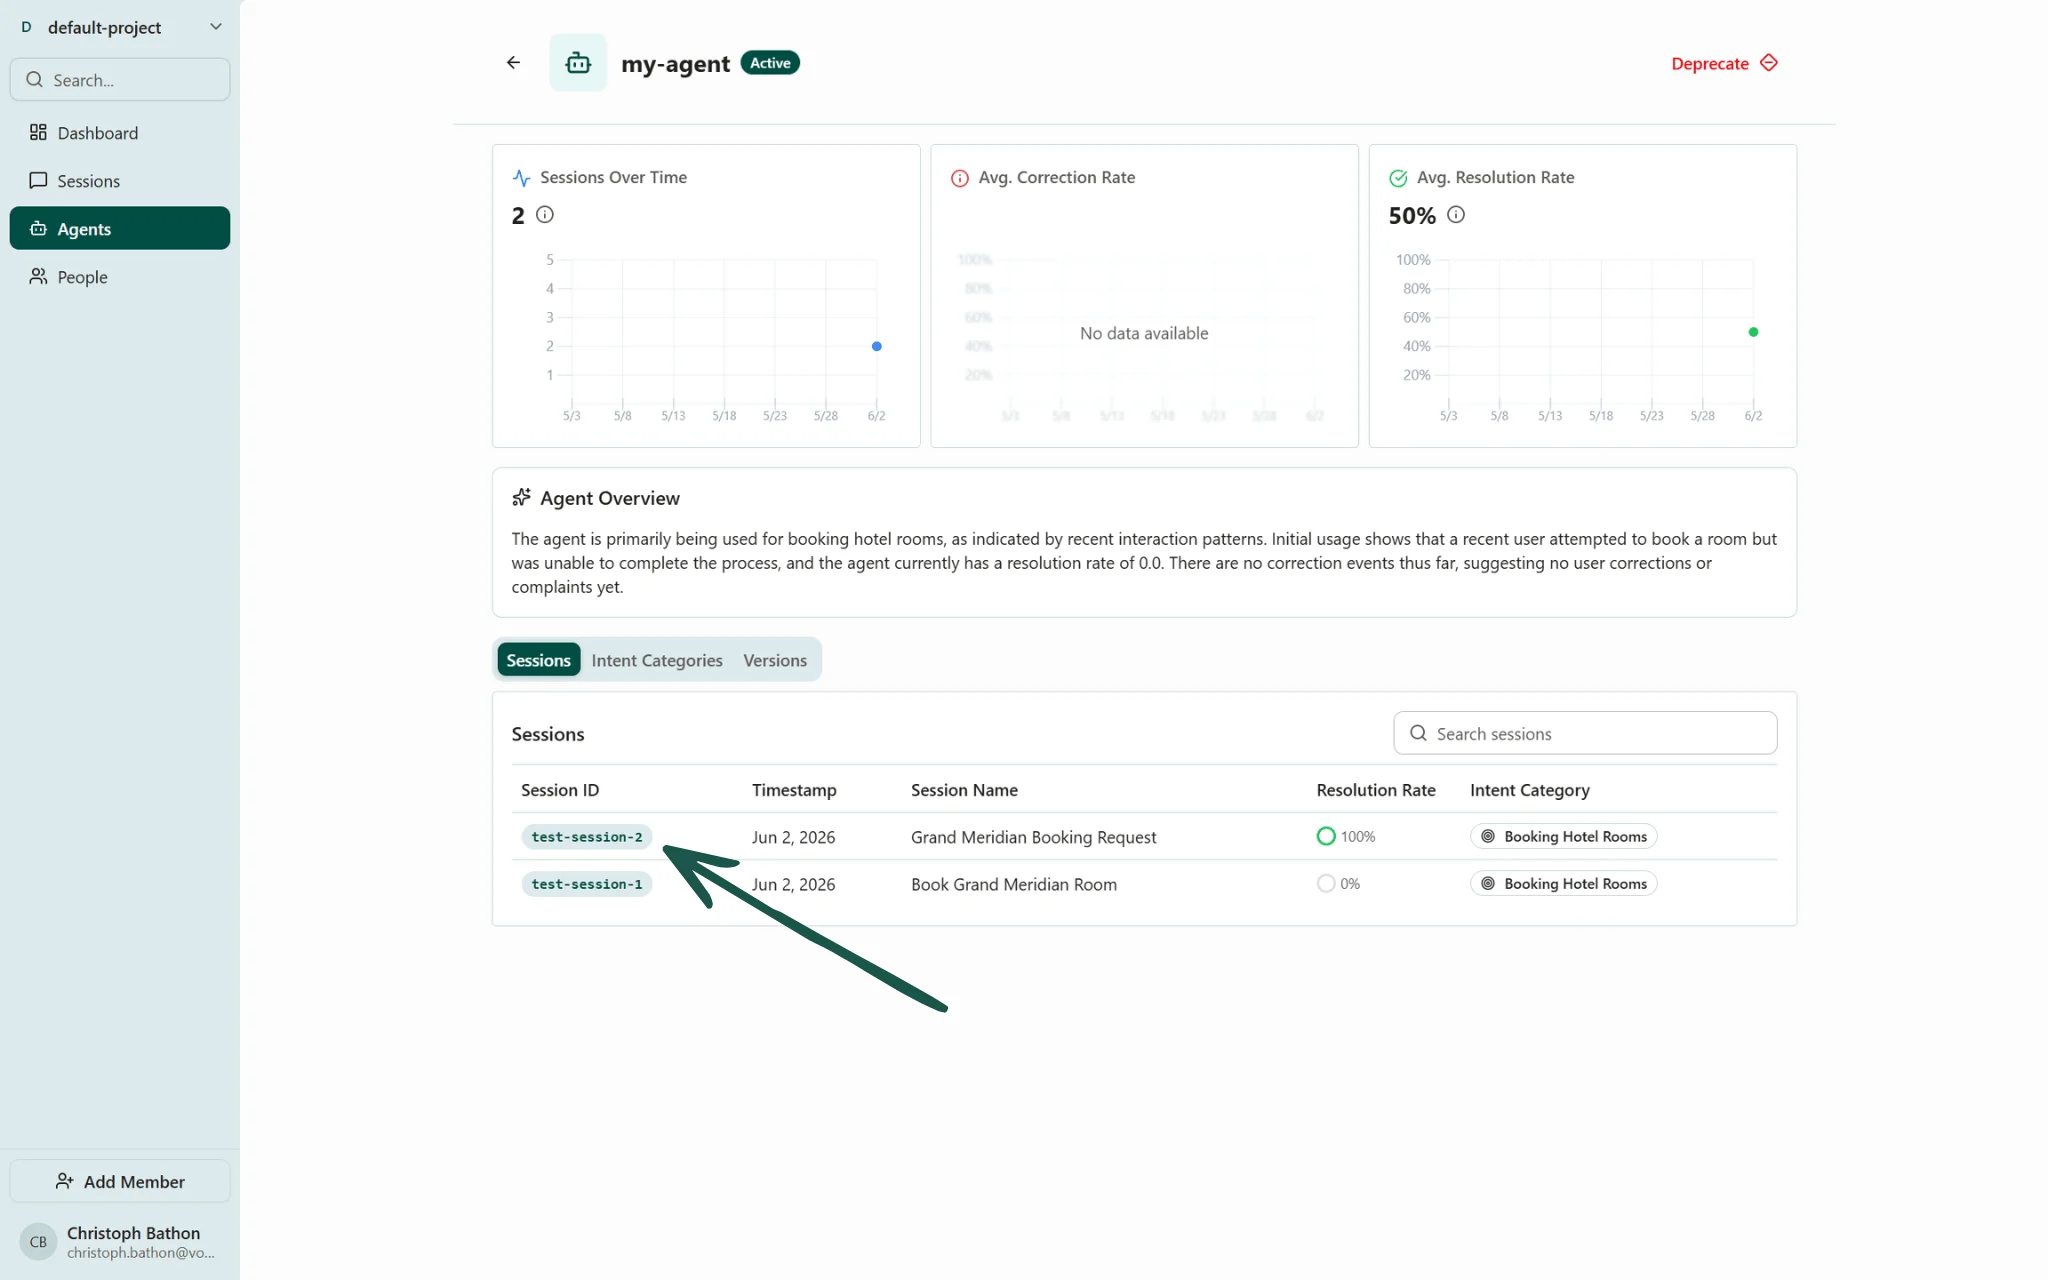
Navigate to 'Agents' in the sidebar and click into the agent to view sessions in the 'Sessions' tab
What you’ll get
- Overview of all Intent Categories for your agent, along with their resolution and correction rates. Filter by Agent Version to compare performance across changes and identify which ones led to improvements or potential regressions.
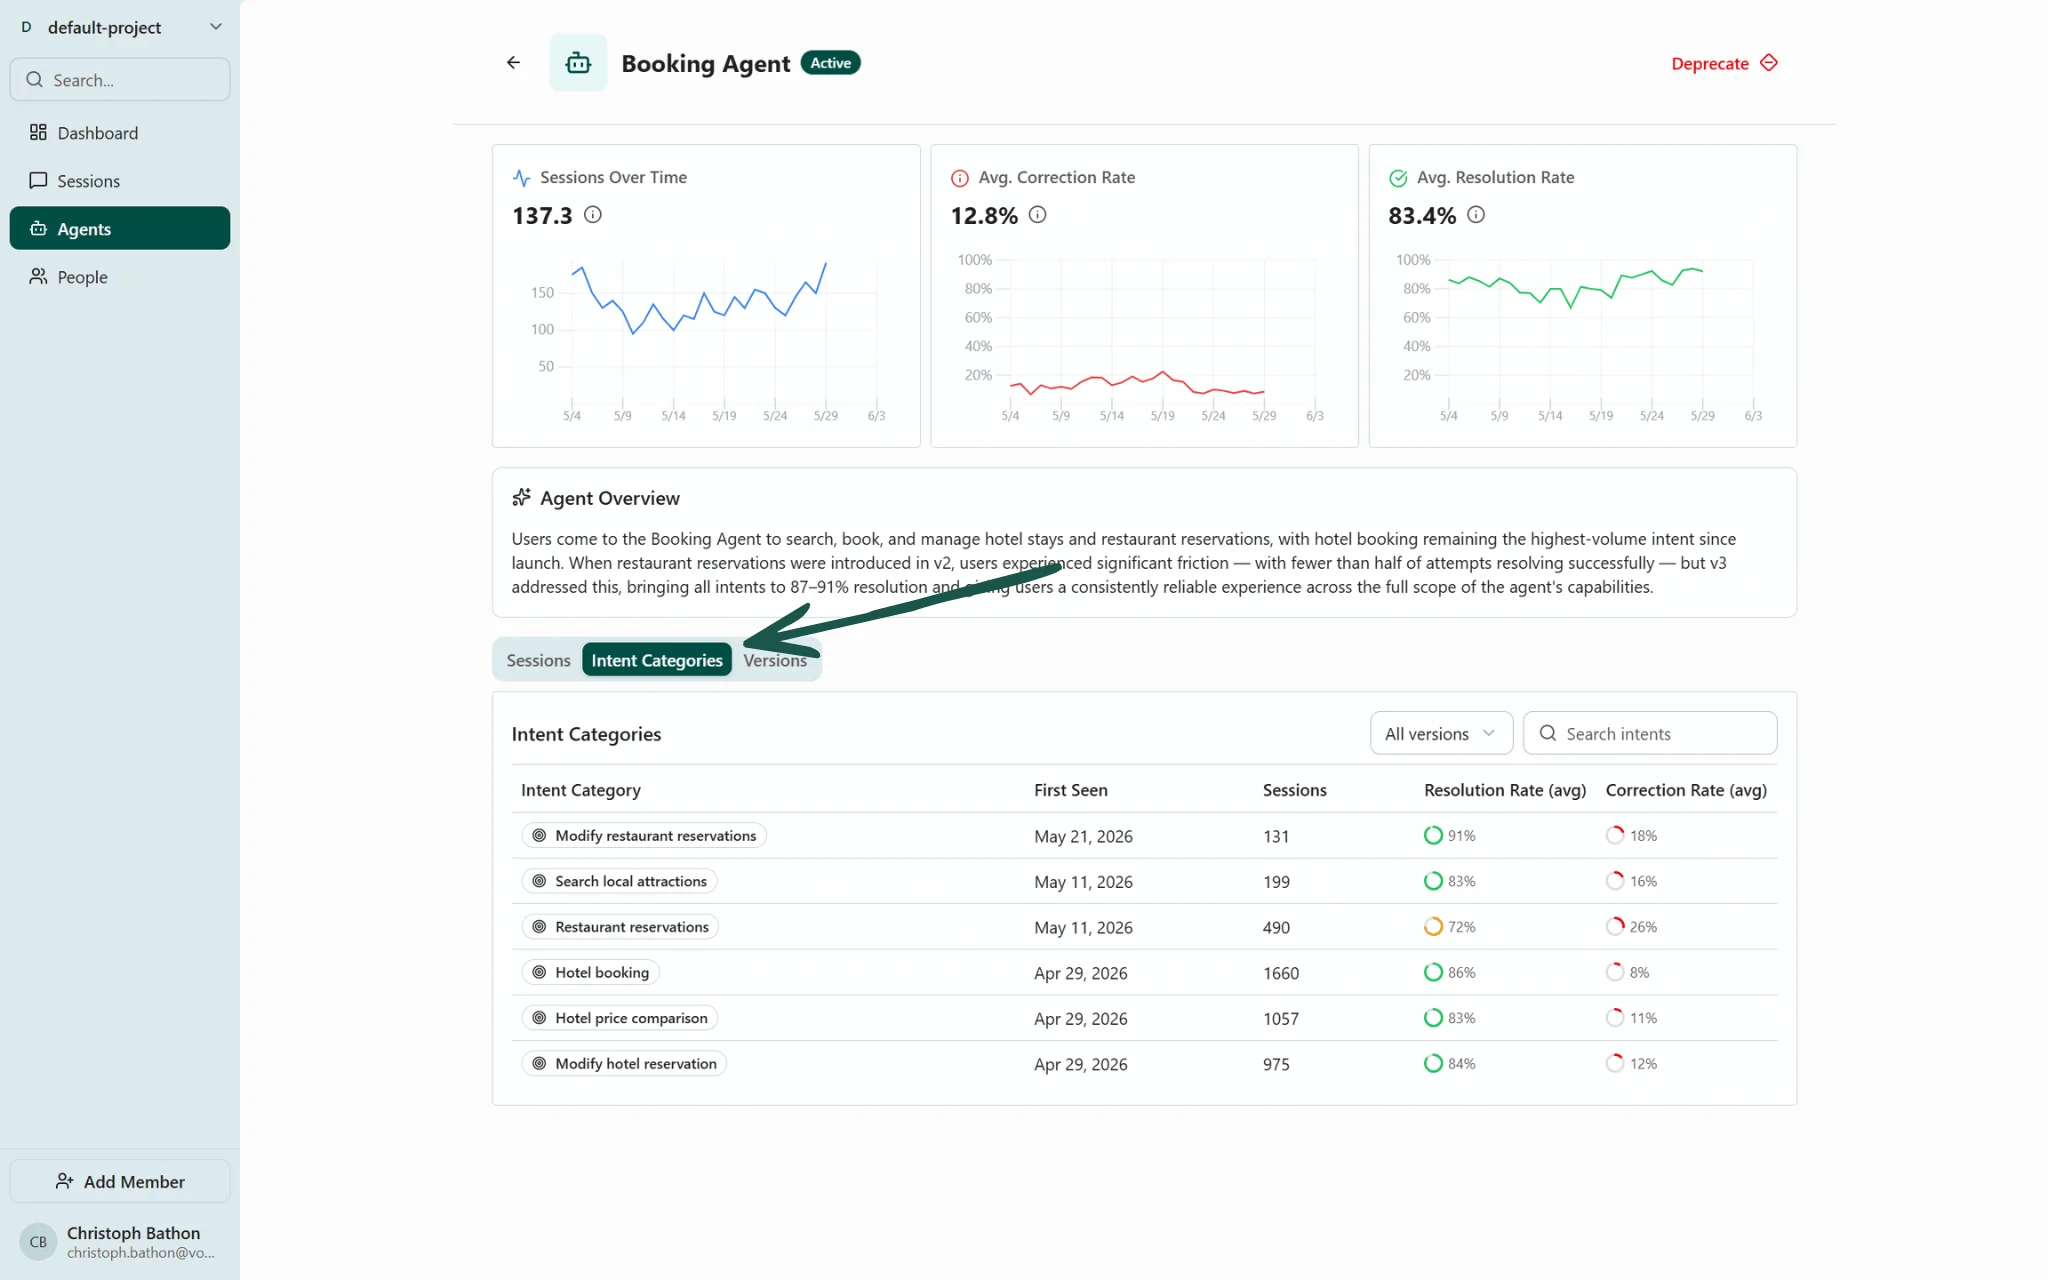
Navigate to the 'Intent Categories' tab in the agent details page to view performance metrics by intent category
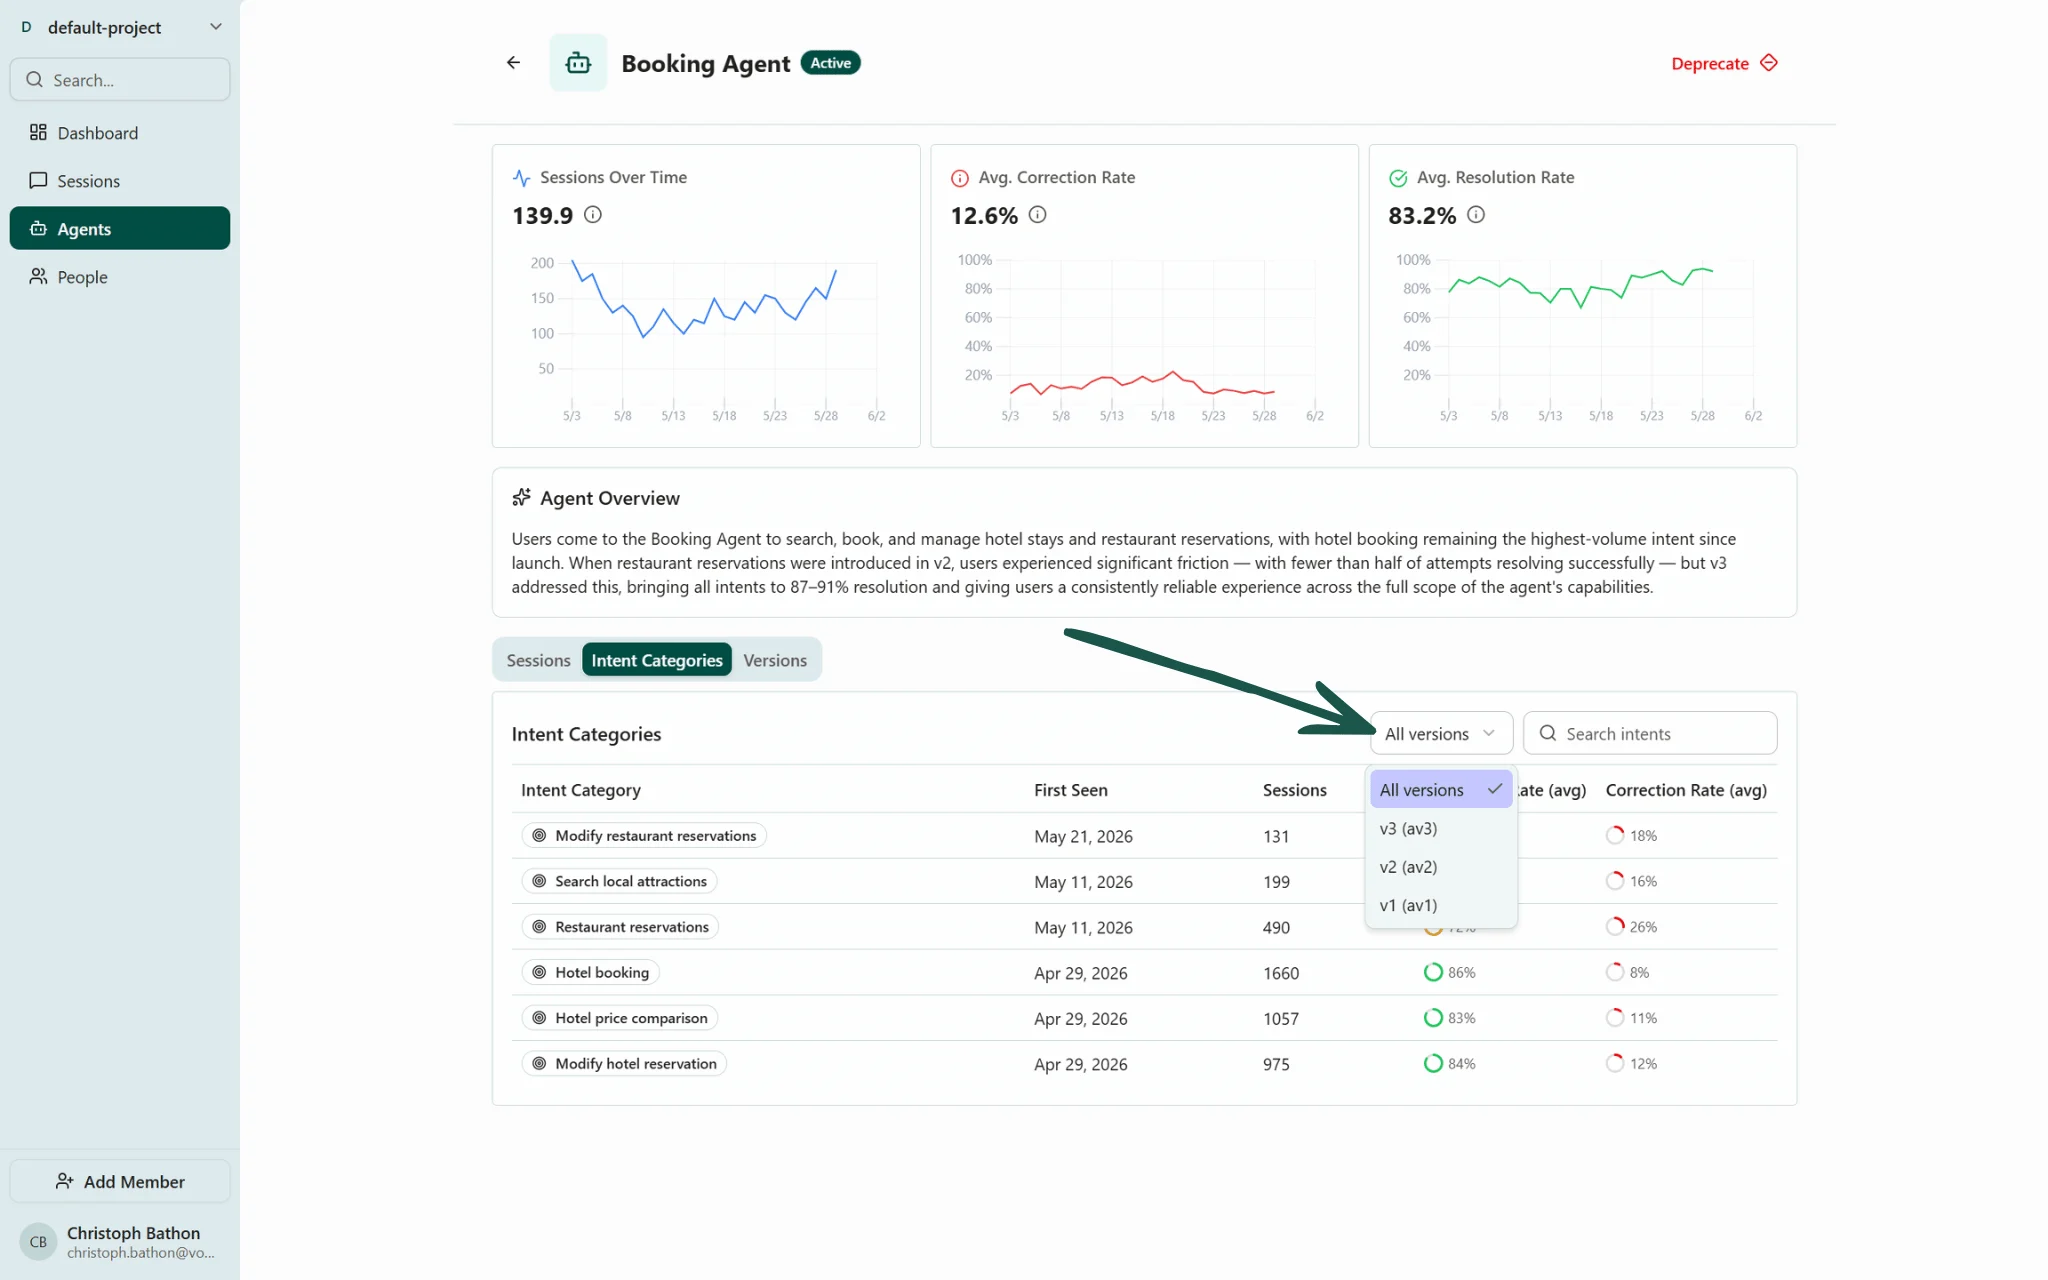
Use the dropdown selector to filter by agent version and compare performance across versions
- Version history of your agent
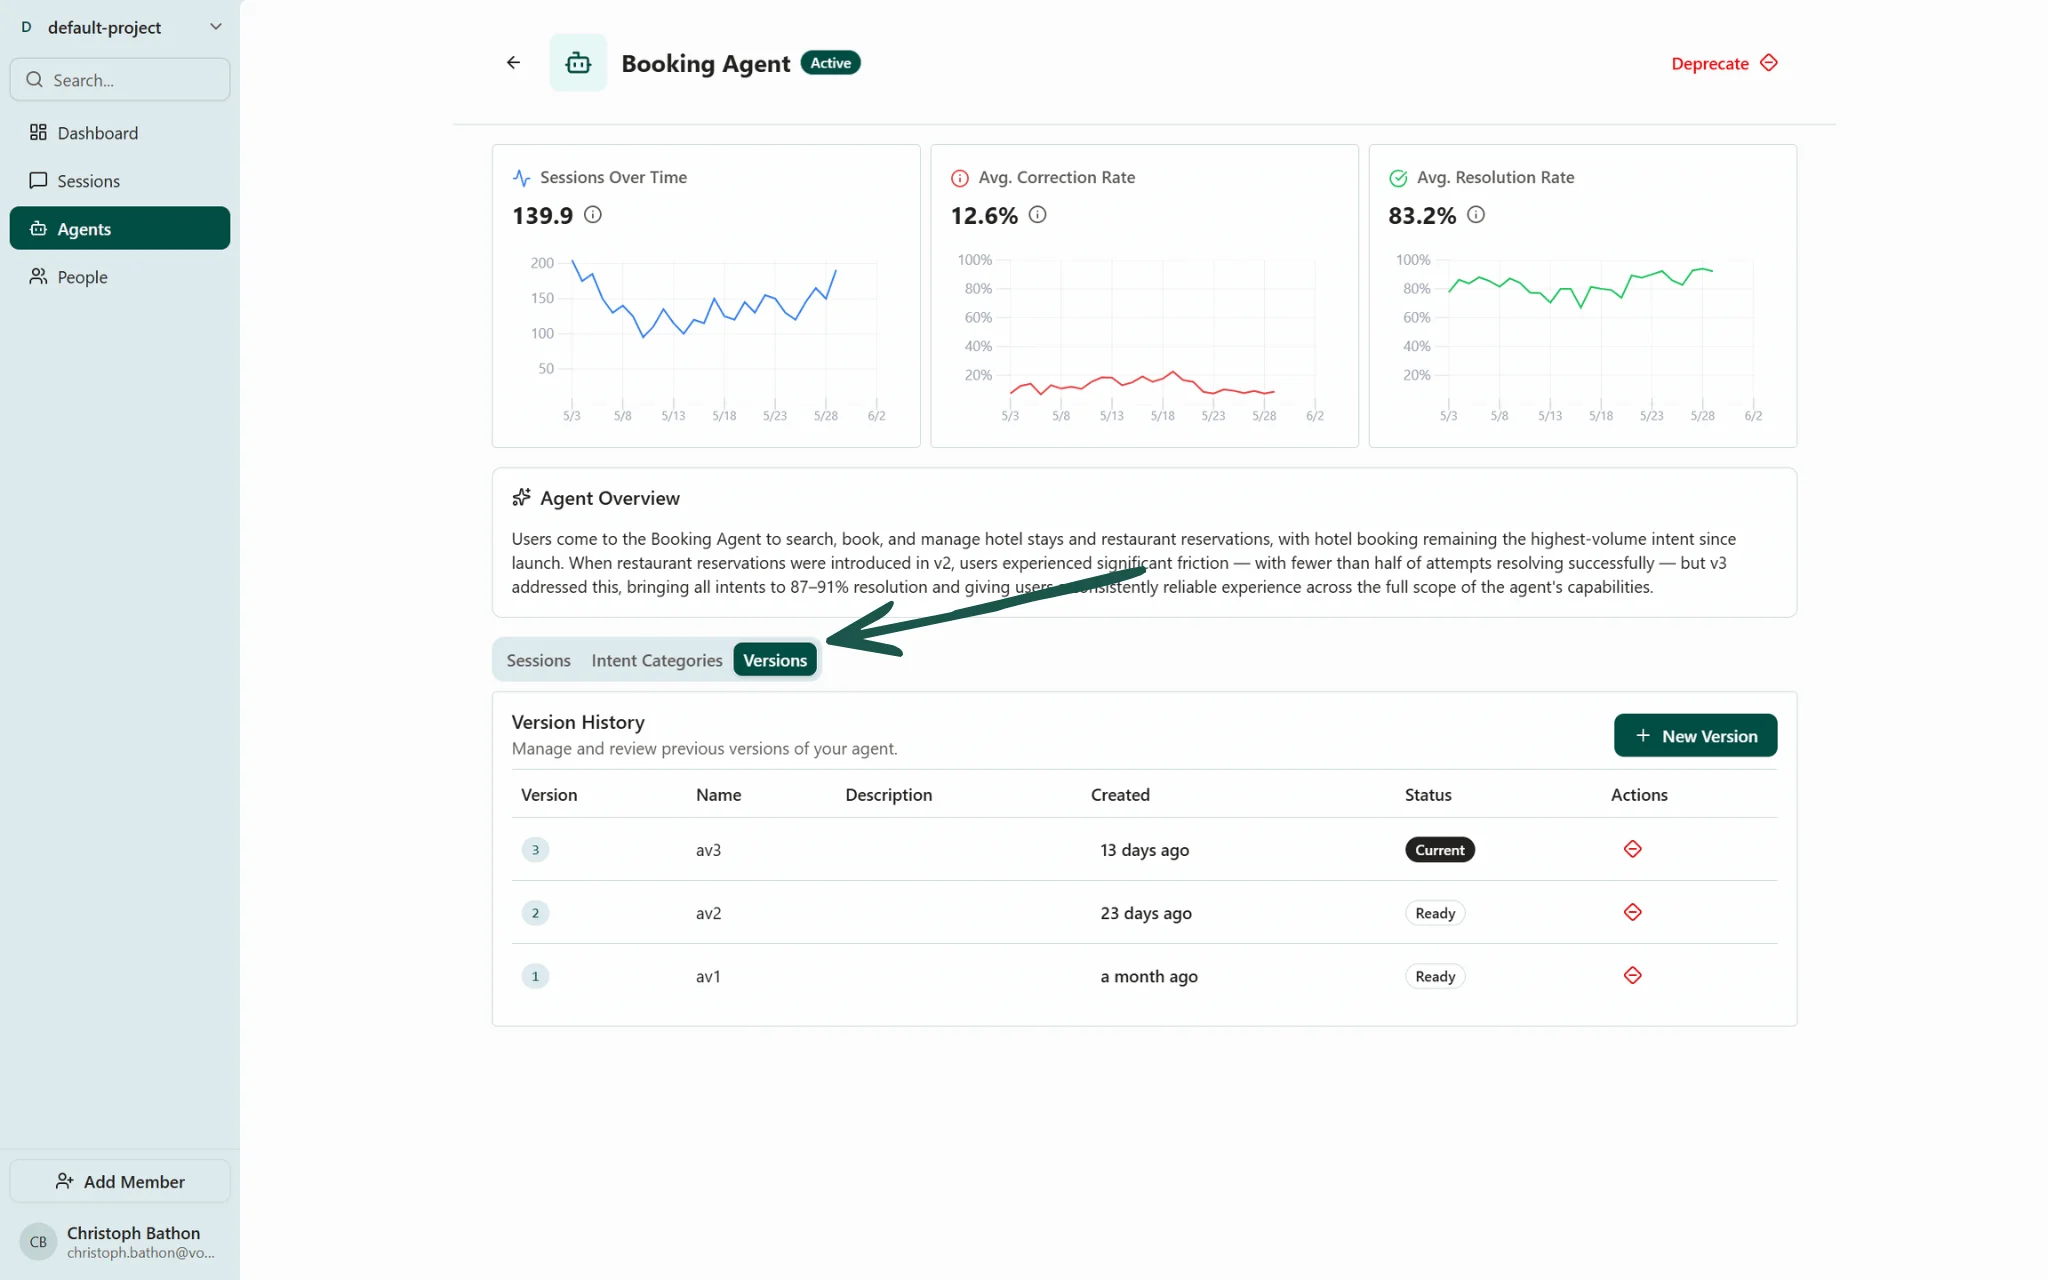
Navigate to the 'Versions' tab in the agent details page to view a history of all versions of your agent.