> ## Documentation Index
> Fetch the complete documentation index at: https://docs.voker.ai/llms.txt
> Use this file to discover all available pages before exploring further.
# Production Monitoring for Customer Support Chat Agents
Related concepts: [Agent](/concepts/agents#agents), [Event Session](/concepts/events#event-sessions)
A customer support agent is a common use case for AI agents, where the agent interacts with users to provide assistance and answer questions.
In this cookbook, you'll learn how to instrument one using Voker's Python SDK, and how to use Voker's dashboard to trace user sessions, view metrics and identify areas for improvement.
## What you'll build
* A customer support chat agent in Python with Voker's analytics to trace users' sessions
* View metrics, a conversation summary and an interactive session timeline for every user session in Voker's dashboard
[Jump to results](#what-you’ll-get)
## Pre-requisites
* Python 3.10+
* Voker API key (get one [here](https://app.voker.ai/signup))
* OpenAI API key (get one [here](https://platform.openai.com/api-keys))
### Step 1: Project setup
```bash theme={null}
mkdir customer-support-agent && cd customer-support-agent
python -m venv venv
source venv/bin/activate # On Windows: venv\Scripts\activate
pip install openai python-dotenv voker
```
Create a `.env` file in your project root with the following content:
```bash theme={null}
VOKER_API_KEY=your_voker_api_key
OPENAI_API_KEY=your_openai_api_key
```
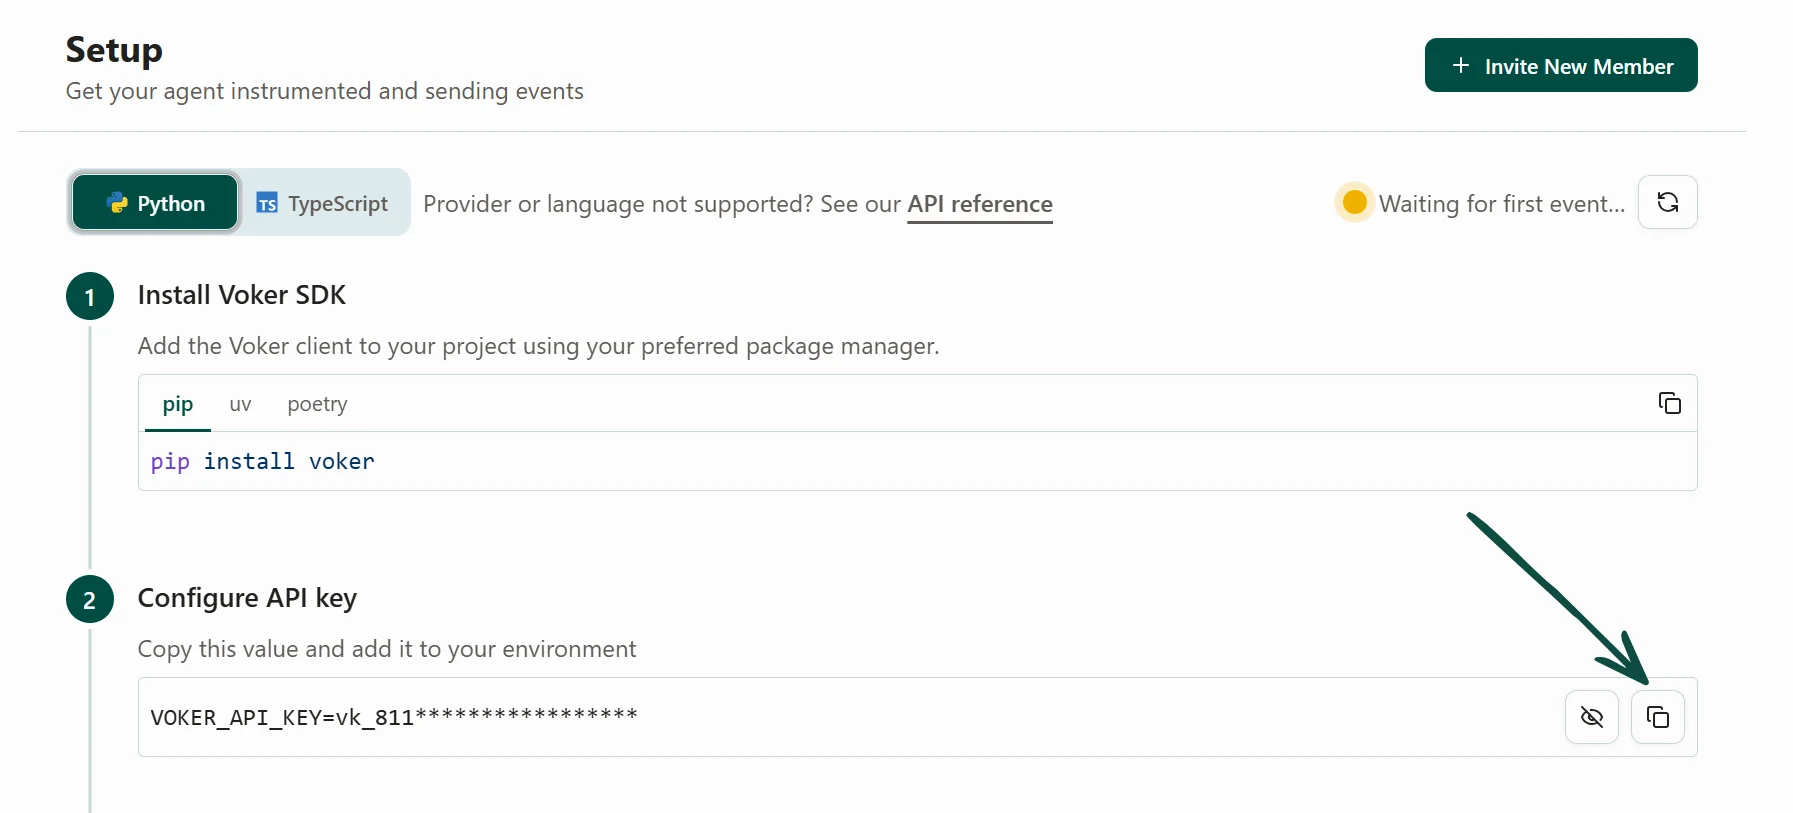
To obtain your Voker API key, sign up for a free Voker account [here](https://app.voker.ai/sign-up). You will be taken to the setup page where you can copy the value.
 ### Step 2: Build the agent using Voker's Python SDK
Create `main.py` and paste the following content.
Voker wraps the OpenAI Python SDK with no additional latency.
You're using the same parameters you're used to, with the addition of `voker_agent` and `voker_session` to group data in Voker.
```python expandable theme={null}
from voker.ai.provider_openai import OpenAI # [!code ++]
from dotenv import load_dotenv
load_dotenv()
client = OpenAI()
SYSTEM_PROMPT = "You are a helpful customer support agent. Ask the user how their day is going and if they need any assistance."
def run_customer_support_agent(messages: list[dict[str, str]], user_message: str) -> str:
def chat(messages):
return client.chat.completions.create(
voker_agent="customer-support-agent", # [!code ++]
voker_session='demo-session-1', # [!code ++]
model="gpt-4.1-mini",
messages=messages,
)
messages.append({"role": "user", "content": user_message})
response = chat(messages)
assistant_message = response.choices[0].message.content or ""
messages.append({"role": "assistant", "content": assistant_message})
return assistant_message
if __name__ == "__main__":
messages = [{"role": "system", "content": SYSTEM_PROMPT}]
while True:
user_input = input("\nEnter your message to the support agent: ")
if user_input.lower() in {"exit"}:
break
response = run_customer_support_agent(messages, user_input)
print(f"\nAssistant: {response}")
```
### Step 3: Run the agent in your terminal
```bash theme={null}
python main.py
```
You can chat with the agent in your terminal. Try asking it for some help and see how it responds.
### Step 4: View sessions in Voker
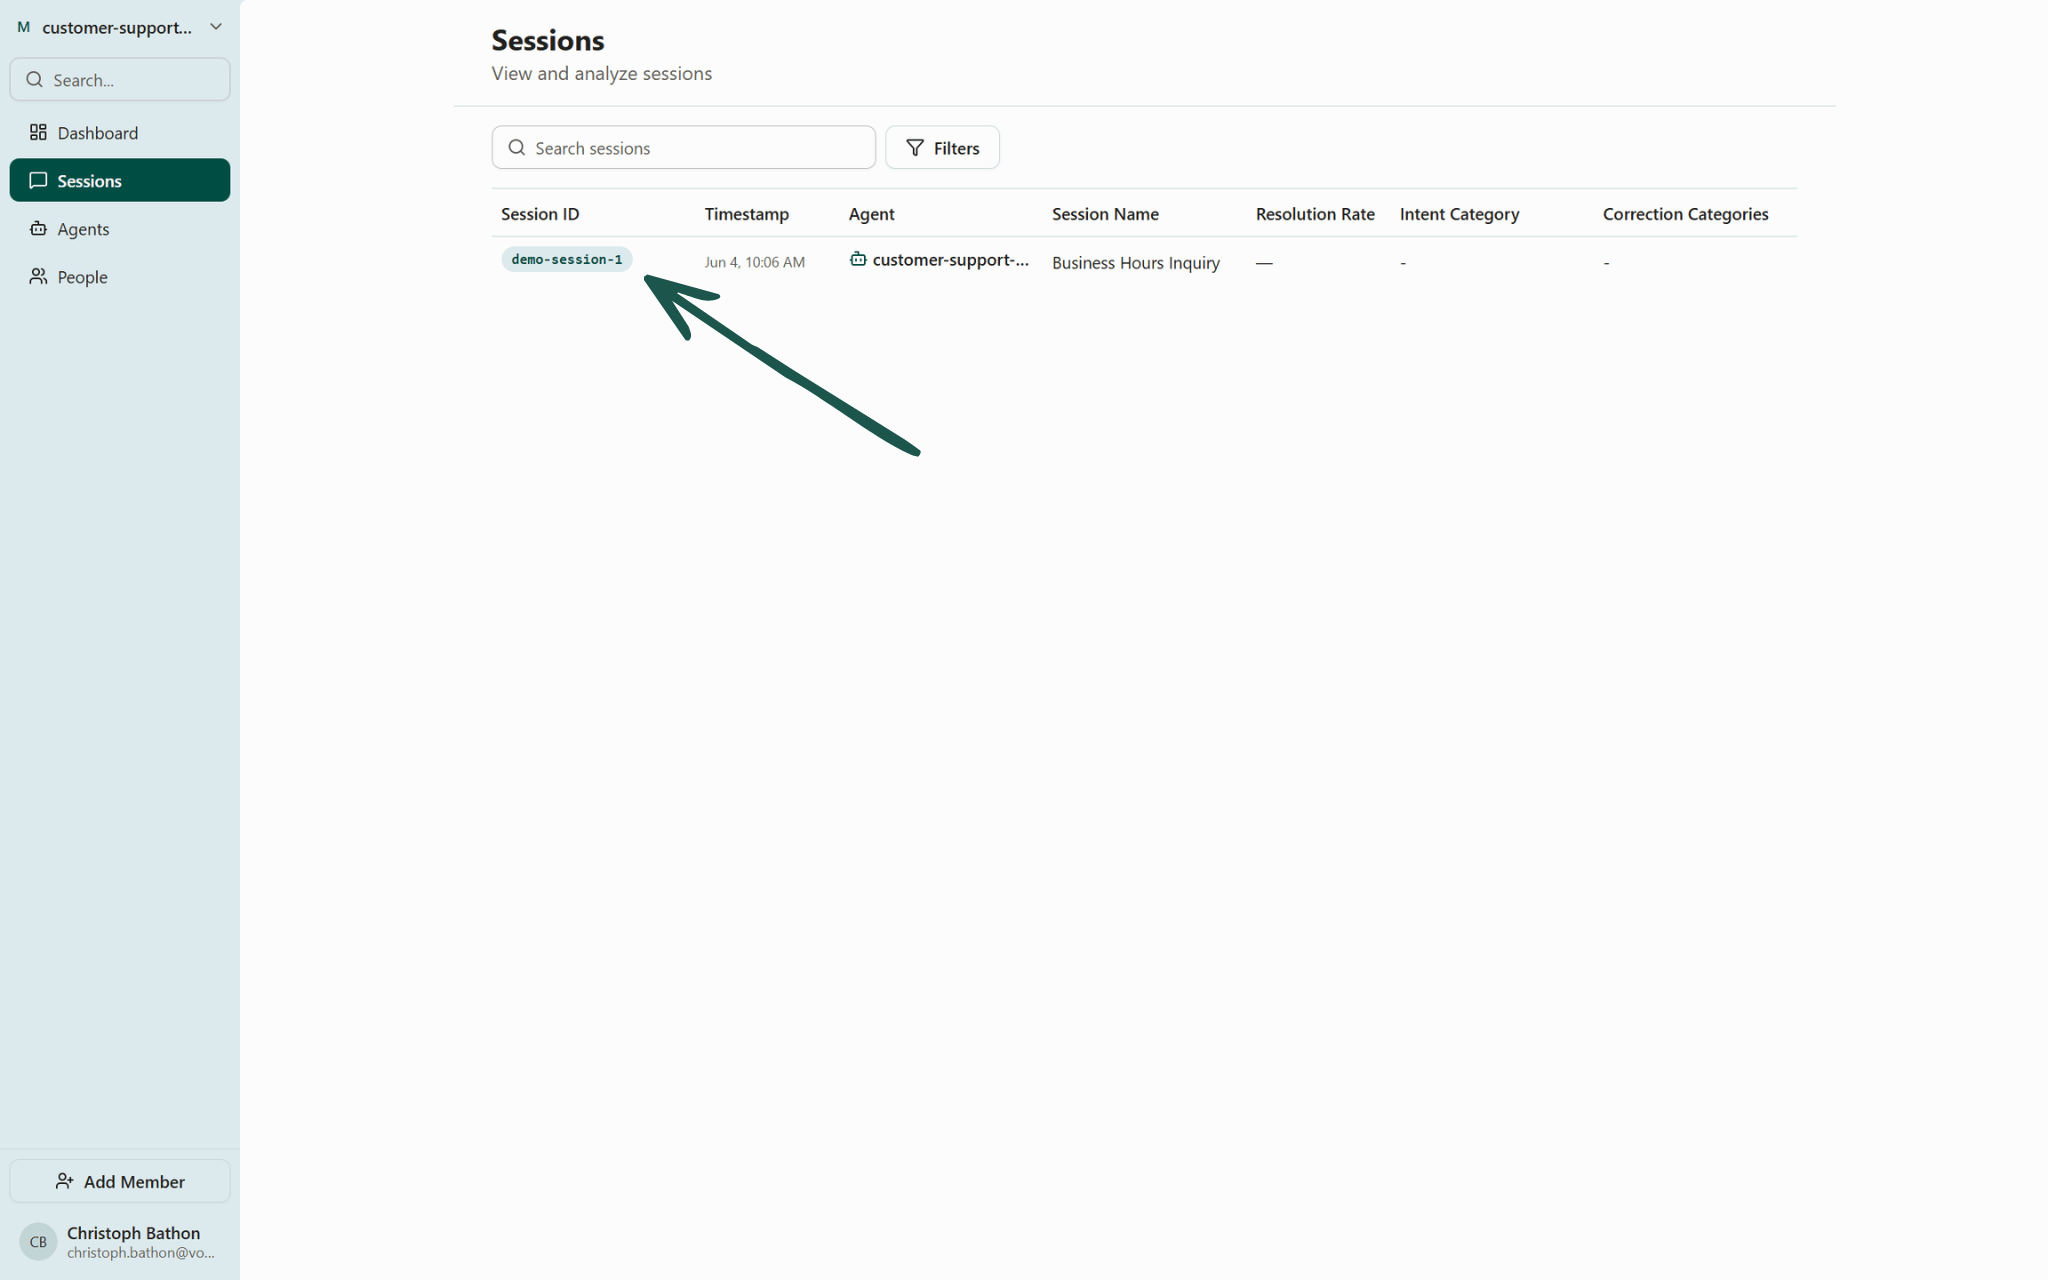
After a brief chat with your agent, head back to [Voker](https://app.voker.ai) and navigate to the 'Sessions' page.
You will see an entry for the conversation you just had with your agent, click into it.
### Step 2: Build the agent using Voker's Python SDK
Create `main.py` and paste the following content.
Voker wraps the OpenAI Python SDK with no additional latency.
You're using the same parameters you're used to, with the addition of `voker_agent` and `voker_session` to group data in Voker.
```python expandable theme={null}
from voker.ai.provider_openai import OpenAI # [!code ++]
from dotenv import load_dotenv
load_dotenv()
client = OpenAI()
SYSTEM_PROMPT = "You are a helpful customer support agent. Ask the user how their day is going and if they need any assistance."
def run_customer_support_agent(messages: list[dict[str, str]], user_message: str) -> str:
def chat(messages):
return client.chat.completions.create(
voker_agent="customer-support-agent", # [!code ++]
voker_session='demo-session-1', # [!code ++]
model="gpt-4.1-mini",
messages=messages,
)
messages.append({"role": "user", "content": user_message})
response = chat(messages)
assistant_message = response.choices[0].message.content or ""
messages.append({"role": "assistant", "content": assistant_message})
return assistant_message
if __name__ == "__main__":
messages = [{"role": "system", "content": SYSTEM_PROMPT}]
while True:
user_input = input("\nEnter your message to the support agent: ")
if user_input.lower() in {"exit"}:
break
response = run_customer_support_agent(messages, user_input)
print(f"\nAssistant: {response}")
```
### Step 3: Run the agent in your terminal
```bash theme={null}
python main.py
```
You can chat with the agent in your terminal. Try asking it for some help and see how it responds.
### Step 4: View sessions in Voker
After a brief chat with your agent, head back to [Voker](https://app.voker.ai) and navigate to the 'Sessions' page.
You will see an entry for the conversation you just had with your agent, click into it.
 ## What you'll get
Insights into every session between your agent and users.
## What you'll get
Insights into every session between your agent and users.
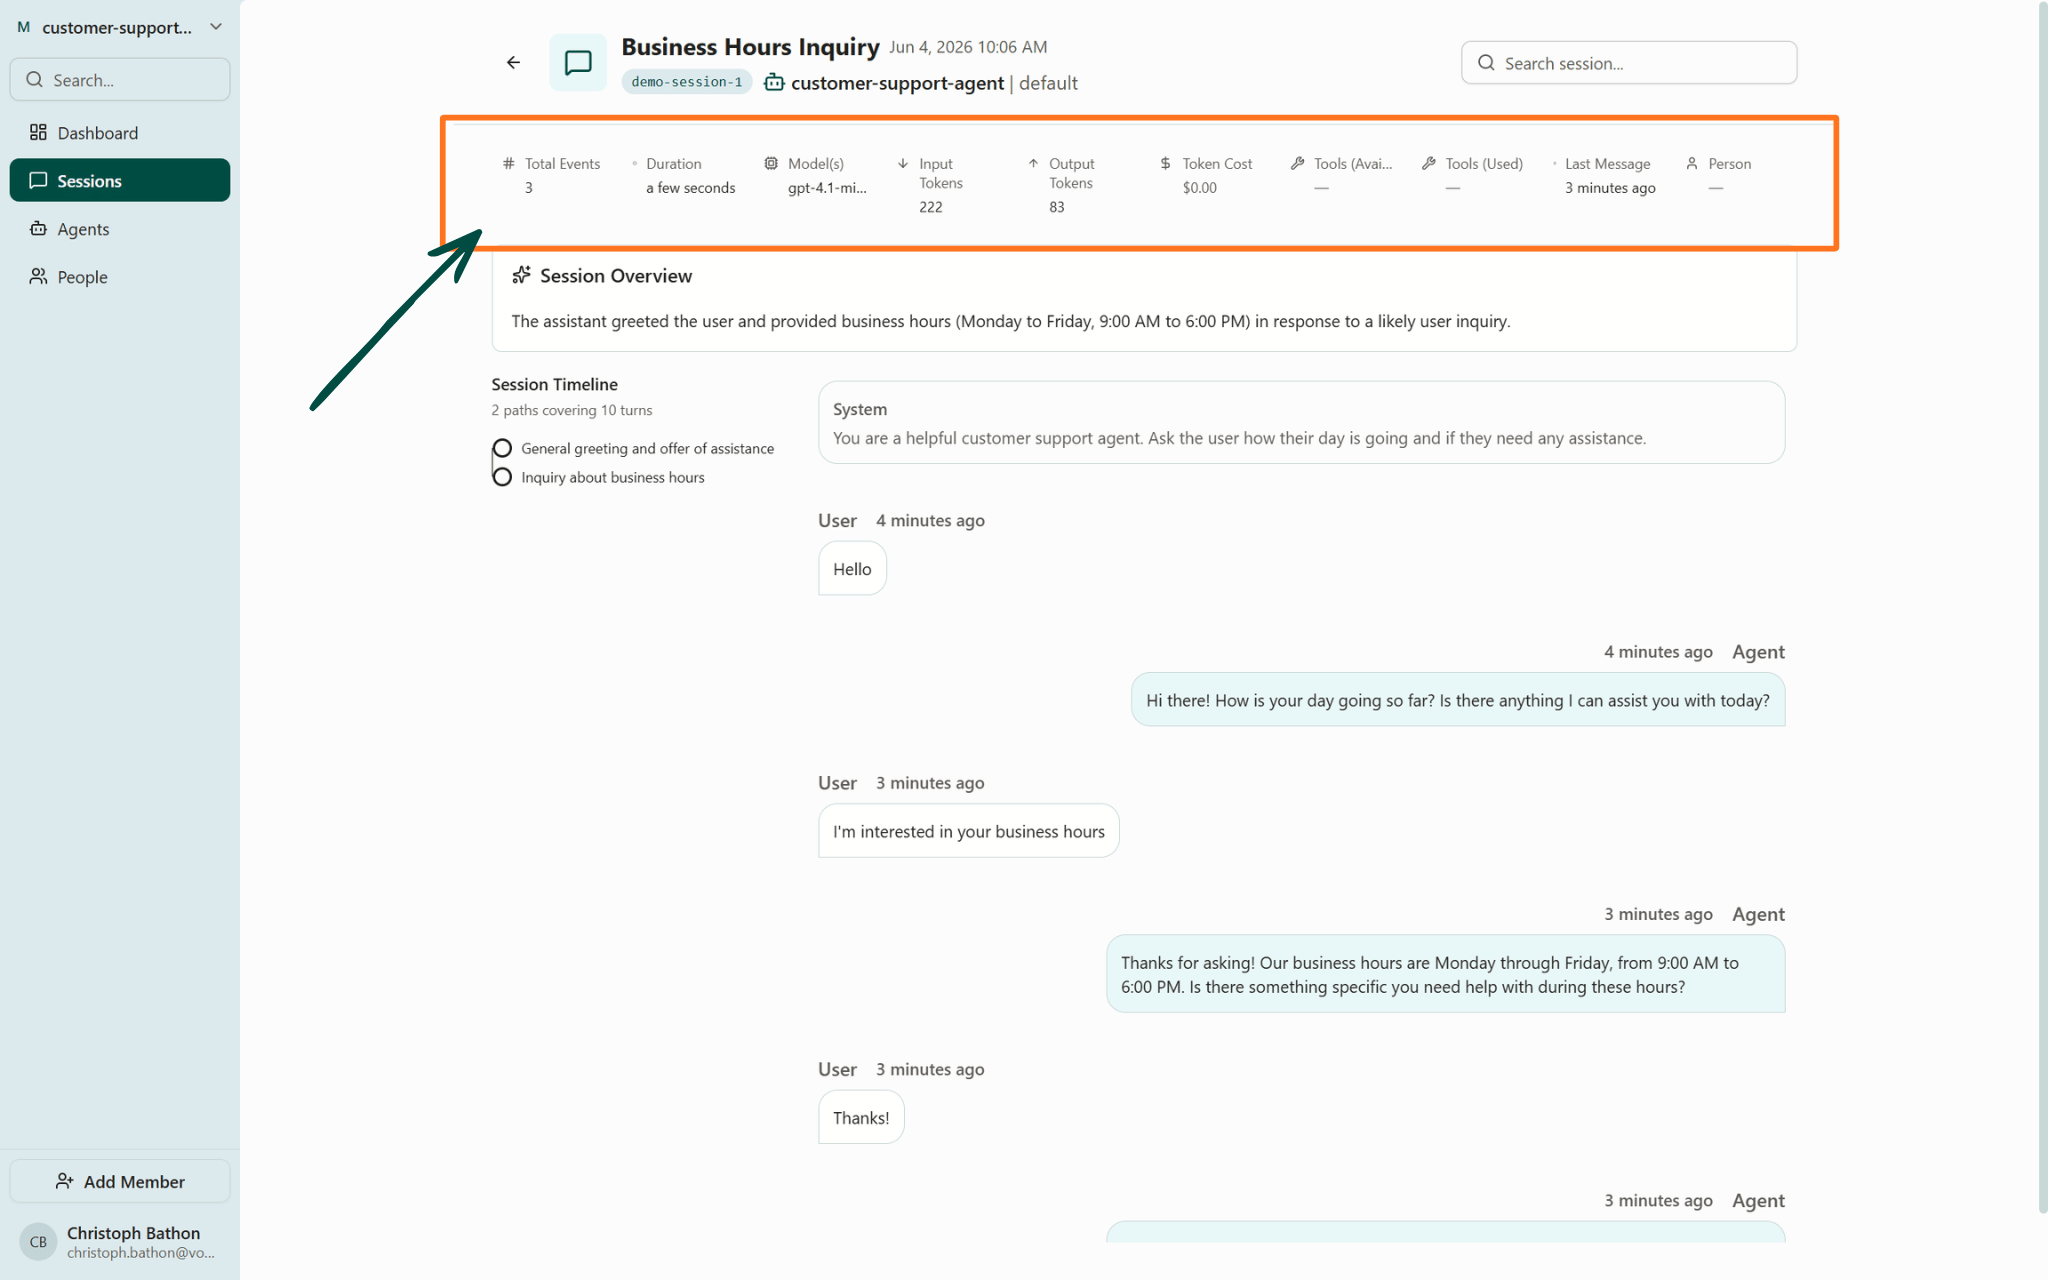
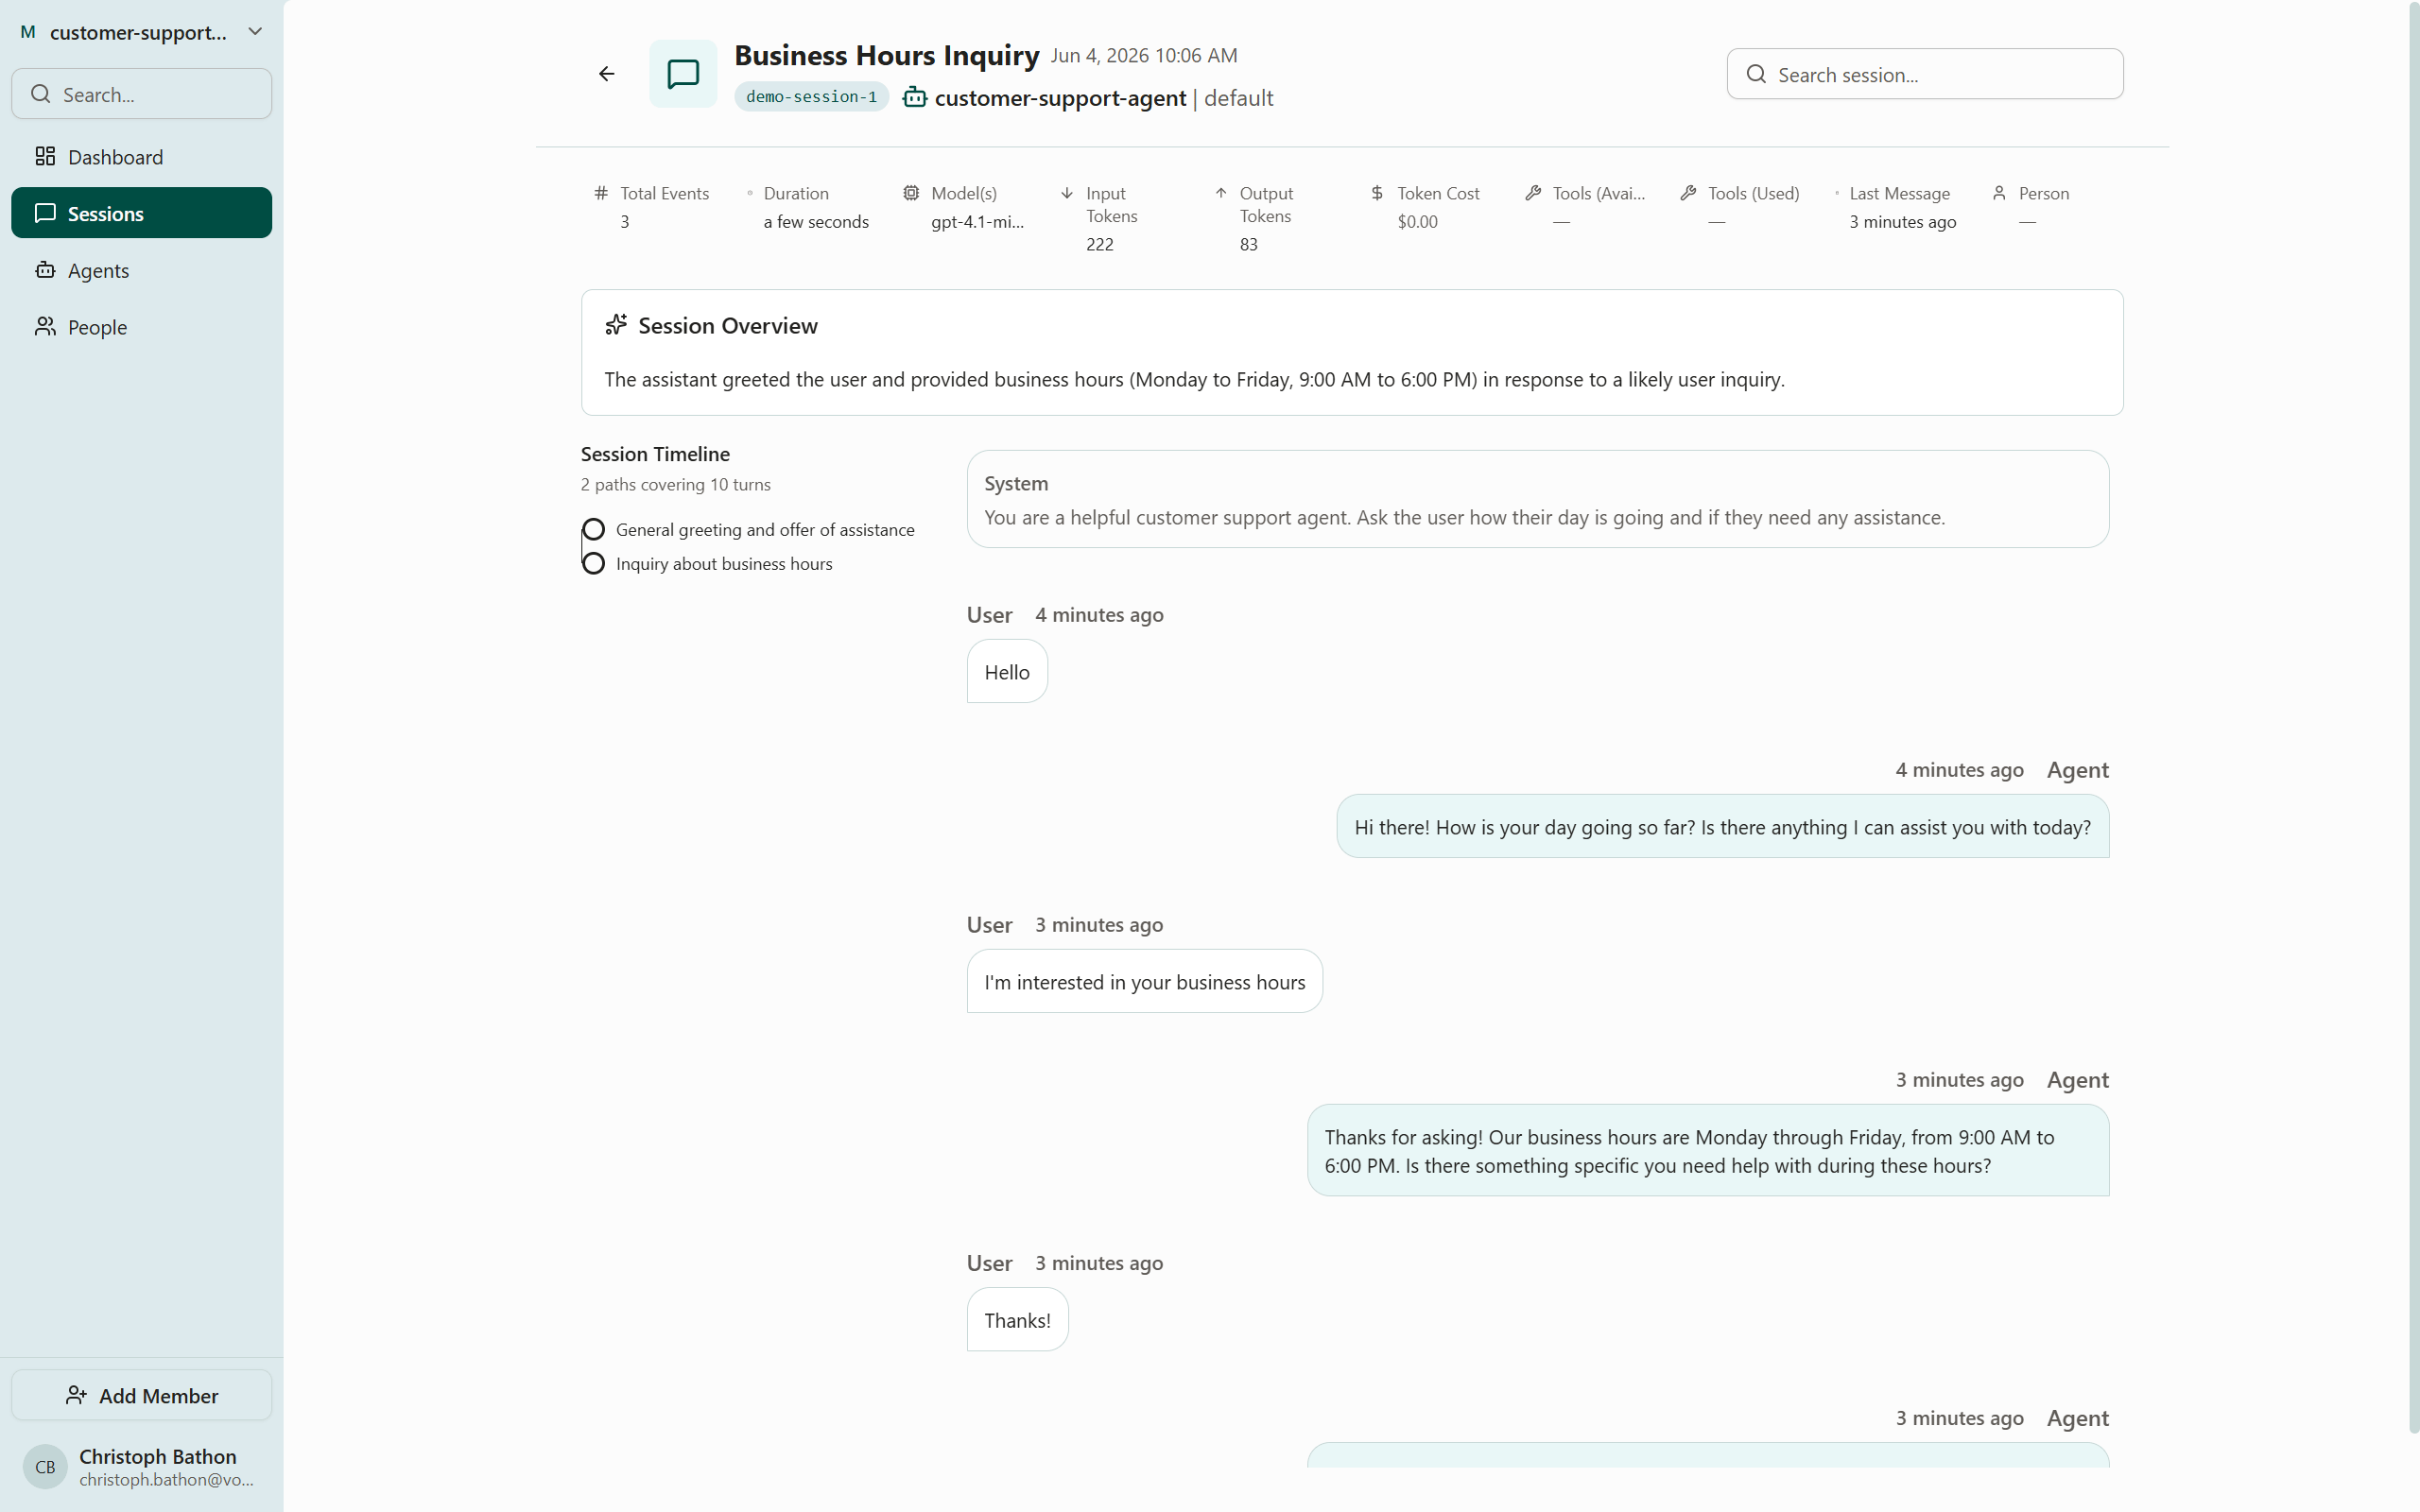 Here is a breakdown of this page:
* A dashboard to view metrics such as model used, token count and available tools
Here is a breakdown of this page:
* A dashboard to view metrics such as model used, token count and available tools
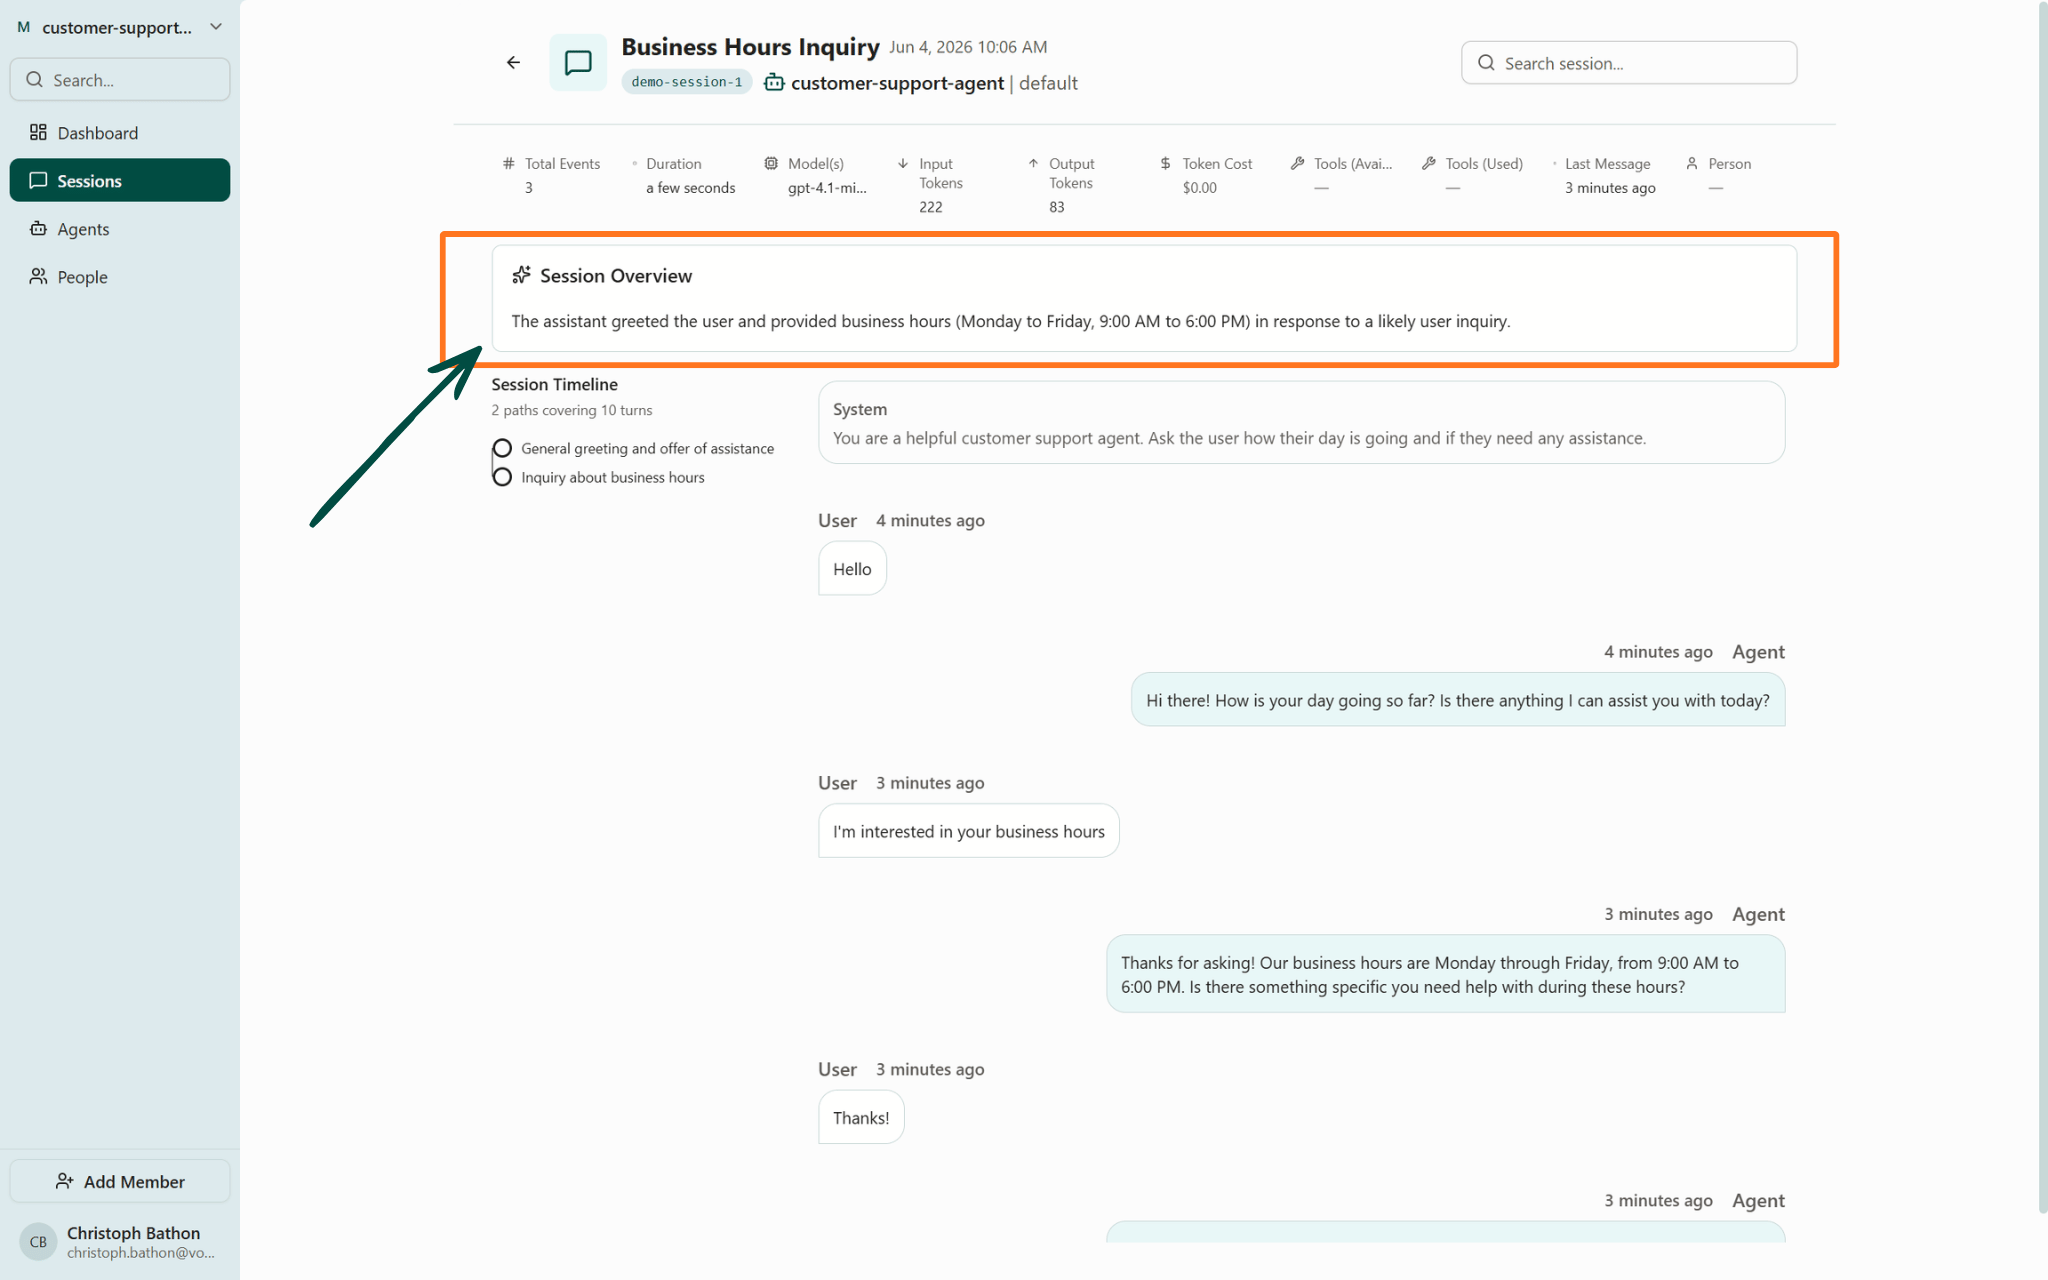
 * A high-level summary of the session
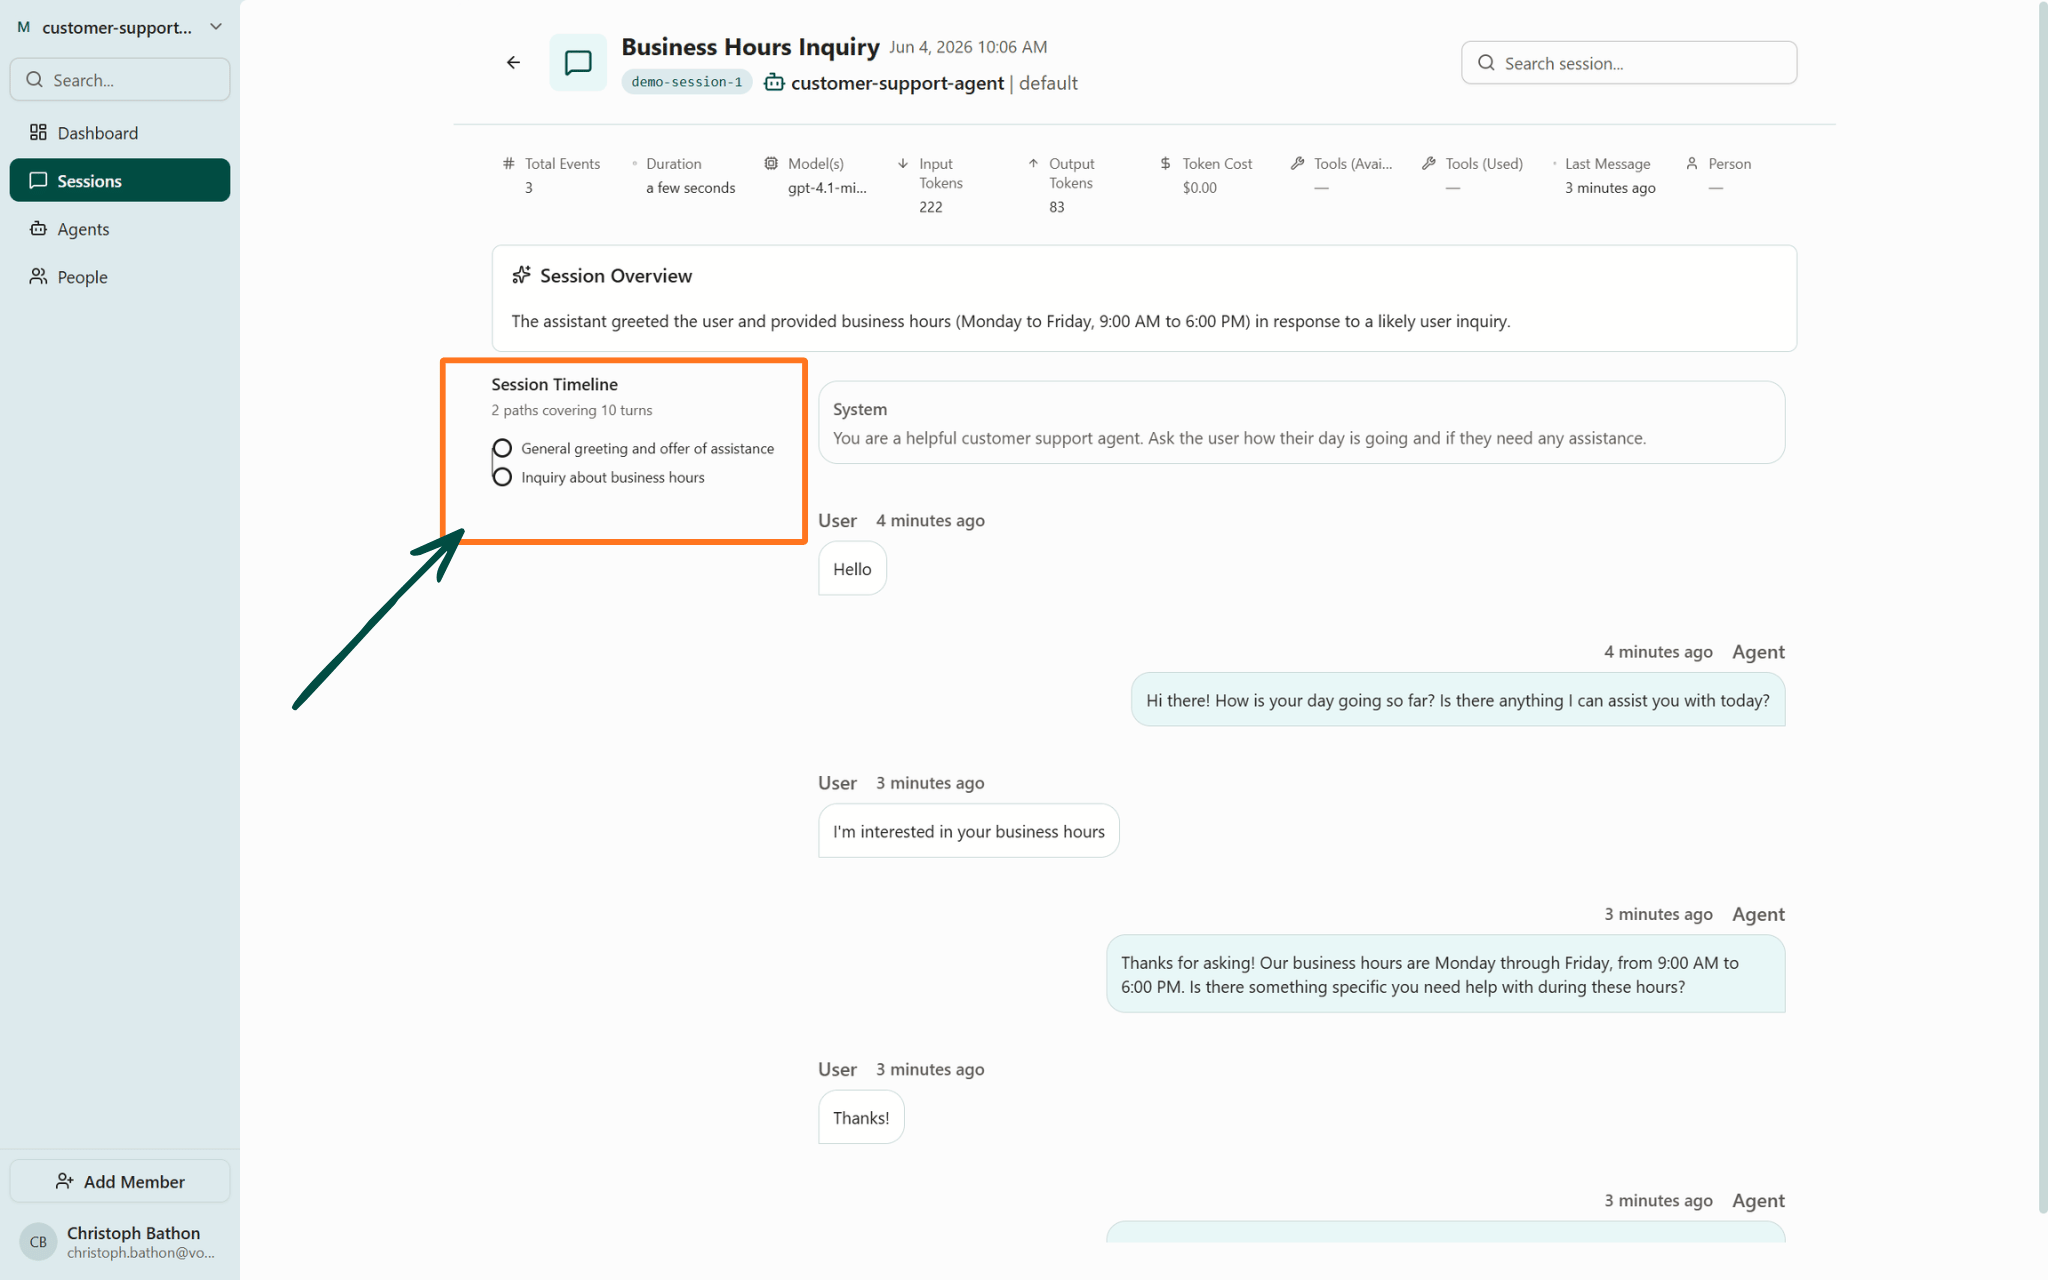
 * An interactive Session Timeline mapping the conversation into a readable format
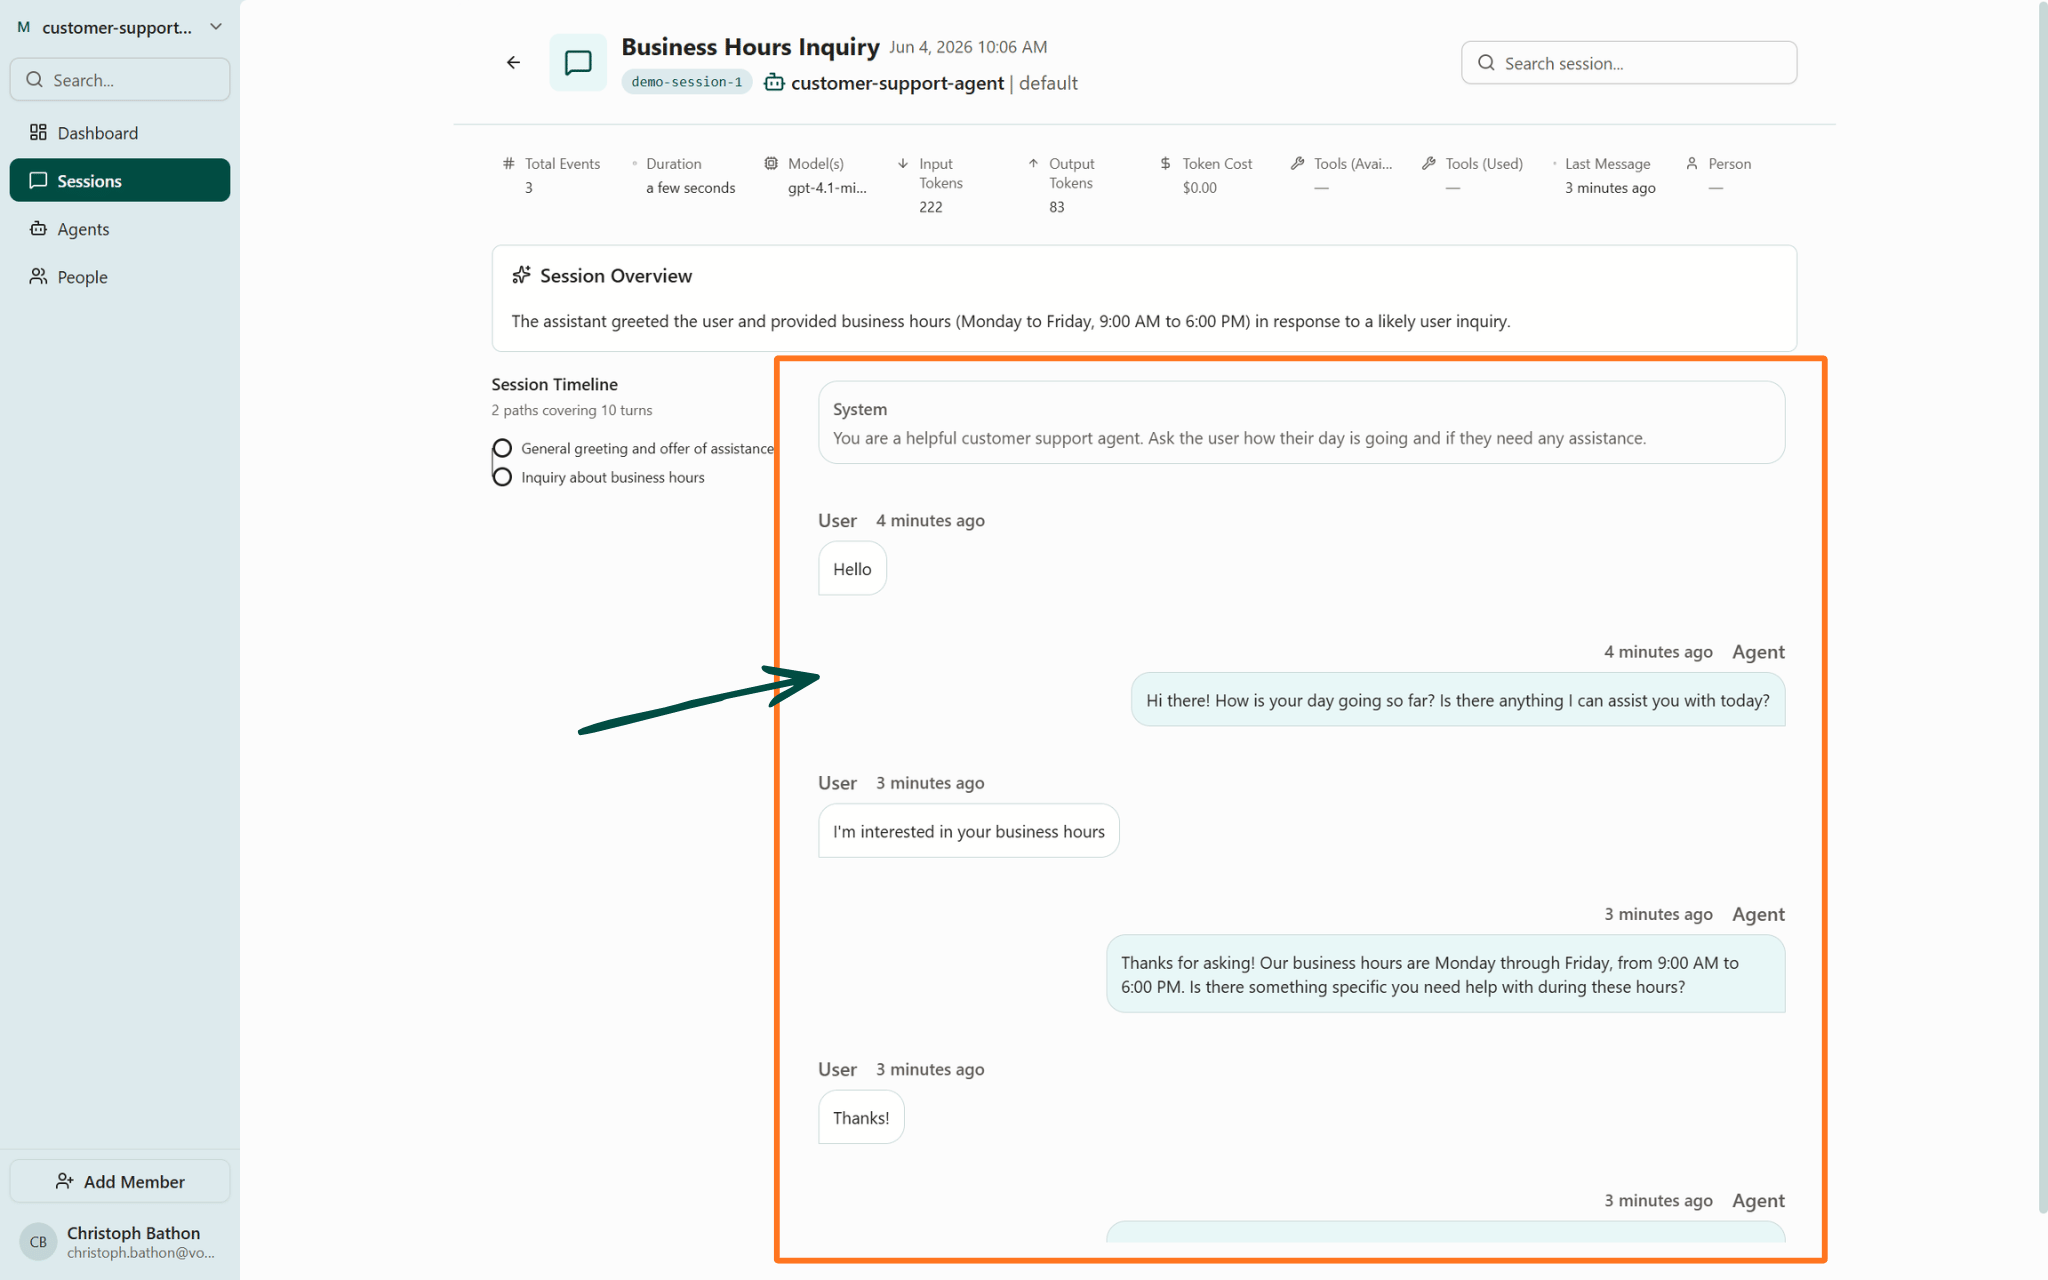
 * The conversation history containing all events
 ## Next steps
You've set up Voker analytics! Visit our Agent Version Tracking cookbook to see how you can identify discrepancies in your agent's performance.
## Next steps
You've set up Voker analytics! Visit our Agent Version Tracking cookbook to see how you can identify discrepancies in your agent's performance.